Posts

Showing posts with the label Shopsmith

Drilling Headlight Holes In the Bad Bob Motors Car Bodies Using a Shopsmith In Horizontal Boring Mode

Image
I'm building a batch of cars with headlights and taillights made from dowels glued into holes. The holes have to be evenly spaced and aligned. They don't need to be perfect close is good enough. If I had this to do over, I would have done it differently. If I had thoroughly thought this through, I would have tried to mount the patterns so that I could have drilled multiple holes without moving anything. If everything was uniform, I could setup once and drill all the suitable headlight holes. Turn the block over, reset the stop blocks, and drill all the left headlight holes. The way it worked out, I had to realign and reclamp for every hole. If you are only making one toy, this isn't an issue. If you are making a lot of them, it can add significantly to the time it takes to make the cars. Here are the cars I'm trying to make. Handmade Wooden Toy Cars - Bad Bob Motors - Coupe Handmade Wooden Toy Cars - Bad Bob Motors - Tudor My Shopsmith has a horizontal bori...

Toymakers Shop Resawing Small Wood Toy Part With A Shopsmith Bandsaw - Dragon Legs

Image
  I cut most of my toy parts from 3/4-inch or thicker stock and then resaw them to the desired thickness. When I resaw the parts after I cut them saves me a lot of time and material. In some cases where the parts are thin, I can get three or more parts from a single piece. Think about resawing a board to 1/8-inch thick to cut two 1/2-inch long parts. You now have a 1/8-inch board that you may never use again. If you resaw from a 3/4-inch board, you will have a 1/8-inch thick board and a 1/2-inch thick board minus the saw kerf that you may not need. I am resawing the legs for a toy dragon from some hardwood cutoffs that are random thicknesses in this video. I am using a Shopsmith bandsaw equipped with a Carter Stabilizer and a 1/8-inch 14 TPI Timber Wolf bandsaw blade. I need the fine tooth blade to get as smooth a cut as possible and to be able to cut tiny parts. I can resaw parts as small as 1/4-inch long and 1/8-inch thick using this method.

Toymakers Shop Shopsmith Bandsaw Carter Stabilizer Test

Image
  Shopsmith Bandsaw With A Carter Stabilizer Test Cut Using A 1/8-inch 14 TPI Blade Shopsmith Bandsaw With A Carter Stabilizer Test Cut Using A 1/8-inch 14 TPI Blade Shopsmith bandsaws are different than most bandsaws. They do not have crowned wheels, and they do not have a tracking adjustment. The setup instructions that are shown in the Carter Products demo will not work on a Shopsmith bandsaw. Preloading the blade by pushing it forward 1/8-inch and adjusting the tracking can't be done. You can push the blade forward 1/8-inch, but there is no tracking adjustment. All it accomplishes is to move the blade out of position and make it for it to run off the wheel. A Shopsmith bandsaw has an automatic tracking system pushing it forward disables the auto track. My solution (so far) is this. Fully retract the Carter Stabilizer and allow the bandsaw blade to track where it should, then adjust the Carter Stabilizer forward until the blade touches the bearing inside the grove. In the test ...

Installing Blue Max Urethane Tires on a Shopsmith Bandsaw

Image
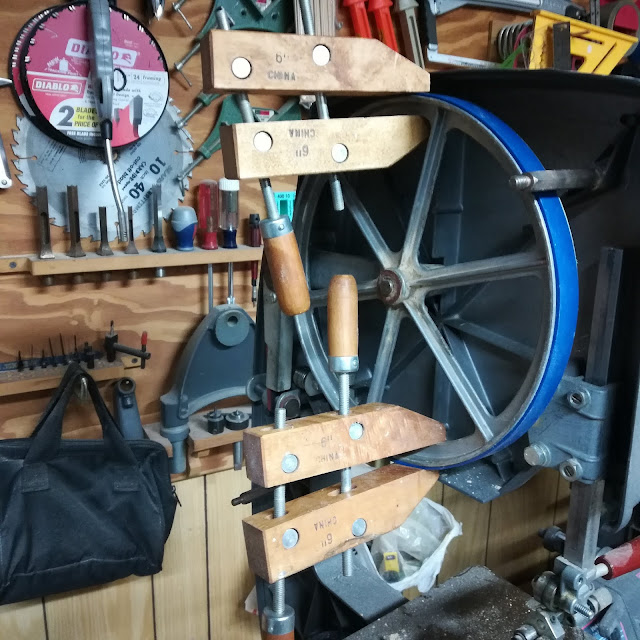
Installing Blue Max Urethane Tires on a Shopsmith Bandsaw   Installing Blue Max Urethane Tires on a Shopsmith Bandsaw My first set of tires were the orange ones. They stretched and came off. I bought a pair of blue tires, and those worked well for a while and then came off and got chewed up by the blade—my fault. Putting these on was a struggle. Both times it took a couple of hours to get them on, finally. I purchased another set of the Blue Max belts. I changed the tires on my bandsaw yesterday for the third time. I finally figured out how to do it. I did not heat the tire or any of that nonsense. I discovered that you have to keep the wheel from moving and hold the belt in place. I have tried every sort of clamp you can imagine, only to have the clamp pop off and go flying across the shop. It finally dawned on me to try hand screw clamps. Hand screws are made of wood, so no worries about damaging the wheel. You can apply a lot of pressure with these clamps. Not only did they hold...

Installing Bandsaw Tires On A Shopsmith Bandsaw

Image
Installing Bandsaw Tires On A Shopsmith Bandsaw   Installing Bandsaw Tires On A Shopsmith Bandsaw   My first set of tires were the orange ones. They stretched and came off. I bought a pair of blue tires, and those worked well for a while and then came off and got chewed up by the blade—my fault. Putting these on was a struggle. Both times it took a couple of hours to get them on, finally. I purchased another set of the Blue Max belts. I changed the tires on my bandsaw yesterday for the third time. I finally figured out how to do it. I did not heat the tire or any of that nonsense. I discovered that you have to keep the wheel from moving and hold the belt in place. I have tried every sort of clamp you can imagine, only to have them pop off and go flying across the shop. It finally dawned on me to try hand screw clamps. Hand screws are made of wood, so no worries about damaging the wheel. You can apply a lot of pressure with these clamps. Not only did they hold the belt very wel...

Bad Bob's Custom Motors - Handmade Wooden Toy Car Bodies Completed

Image
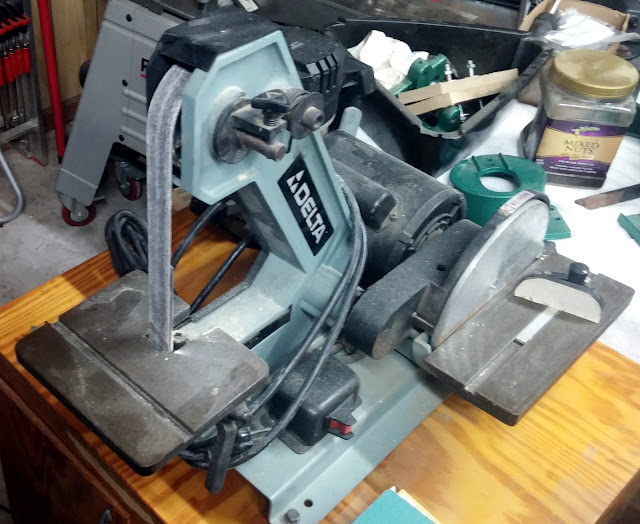
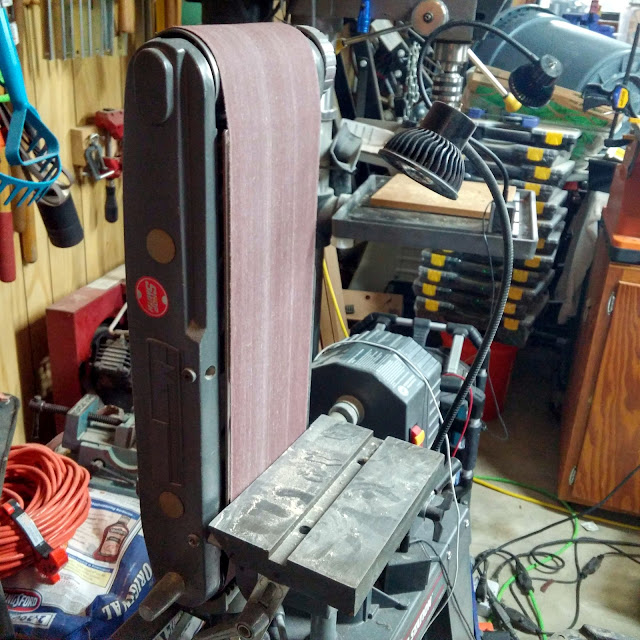
Bad Bob's Custom Motors - Handmade Wooden Car Bodies - Coupe & Sedan Most of the sanding was done with belt sanders. Delta Model 31-340 1x48-inch Belt Sander and my Shopsmith 6x48-inch belt sander. I consider belt sanders essential to a toy makers shop. Before sanding, I rounded over the corners with a clean, sharp 1/8-inch radius round over bit paying very close attention to grain direction to prevent as much tear out as I can. It's ok to back route when doing this because the cut is so small. You can do the round over by hand with sandpaper but the router is more consistent and faster. The rest of the sanding was done by hand using various sanding tools I have made and fingernail file scraps. Delta Model 31-340 1x48 inch belt & 8 Inch Disk Sander Shopsmith - 6x48" Belt Sander

Resawing Small Irregular Shaped Parts - Can it be done?

Image
Handmade Wooden Toy Car - Bad Bobs Custom Motors Coupe Handmade Wooden Toy Car - Bad Bobs Custom Motors Sedan I started making these before the "official plans were released. I only had drawings and no final dimensions. I made some assumptions and one of them turned out to be wrong. I made the fenders to thick.  Now I had a pile of fenders the wrong size. I needed to remove 1/2 inch or make new fenders. I could sand them to size on a belt sander but the weather is miserable and I sure don't want to do that kind of sanding in my garage. Scrollsaw? No way I could hold it straight enough and they would likely break. Use the table saw. Forget it. I could have nightmares from thinking about it. I tried every hand saw I have that I thought had a chance of working. I have a Dozuki saw that would have done it if it had bee just a bit wider. The back kept the saw from cutting all the way through. I have a Shopsmith bandsaw with a Carter guide and a 1/8 inch blade...