Posts

Showing posts with the label Tools

I Sold My RBI Hawk 220 Scroll Saw - A Little History

Image
RBI Hawk 220 Scroll Saw If I had the floor space, I might have kept it. It took about three weeks to sell on the Facebook marketplace, and I let it go for $100.00 with some blades and spare parts. I bought it several years ago, covered with dust and sitting in the back of a barn. I spent well over $100 refurbishing it, and it was my go-to saw for a long time until I purchased a used Excalibur EX-21. It didn't take long before the Hawk was collecting dust. I gave away my old AMT 16-inch saw to a friend, and the Hawk became my backup saw. My EX-21 is my backup, and a Pegas saw is my primary. While I had my AMT, EX-21, and Hawk scroll saws sitting next to each other, I experimented. I cut the pattern using the same wood and blade type on all three saws. There was very little difference in the way they cut. Surprisingly, the AMT saw produced a smoother cut than the other two. For me, blade changes trumped everything, so the EX-21 was the winner. The AMT had to go, and I began a search ...

My New Pegas Precision Scroll Saw

Image
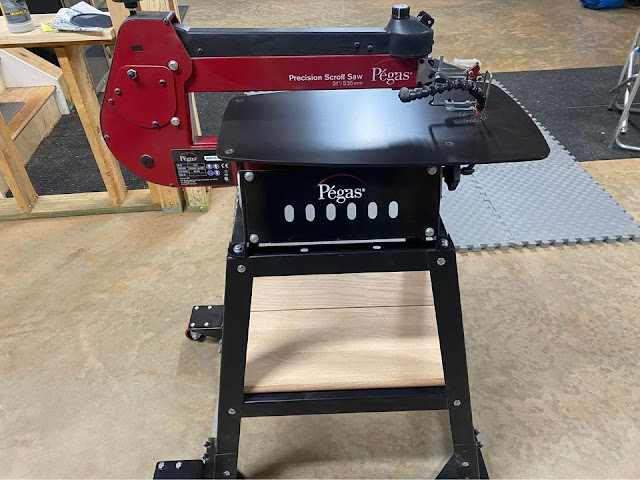
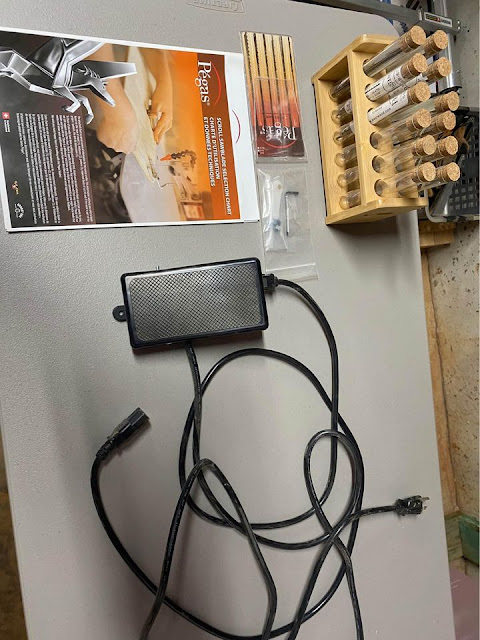
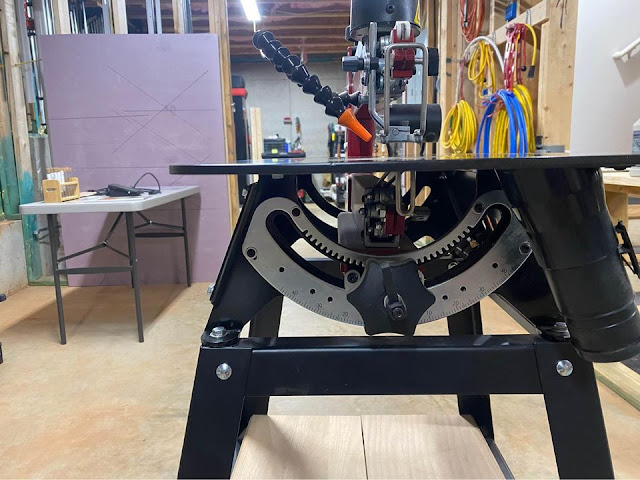
  Pegas Precision Scroll Saw   My new Pegas saw is up and running. I read the manual and could not find any place where it talked about adjusting the upper arm parallel to the table, as my EX-21 says. I did it anyway, as it was so far off I could see it without measuring. This is the first saw I have ever had that has the guards in place. There was one on the bottom as well as the top. I removed the top guard because it significantly interfered with installing the blade, and I removed the bottom guard because it banged against the table when the saw was rum at high speed. Removing the lower guard required me to remove the table to get to the screws. I replaced the screws in case they were holding something inside. While the top was off, I discovered that the thin plastic part of the dust collection was only attached to one side. I made one from a piece of magnetic sheet that I had. After waxing the bottom of the table and everything I could not get to without removing the tabl...

The Evolution of My Toy Maker's Shop Pegboards

Image
Several versions of the peg board used in my shop are 3/4-inch plywood, 3/4-inch plywood with hardboard backing, lazy susan, and 3/4-MDF with hardboard backing.   As a toy maker, I rely on my pegboards for painting and finishing my toys. But over the years, I've learned that not all pegboards are created equal. In this post, I'd like to share my journey of experimenting with different materials and designs to find the perfect pegboard for my needs. My first attempt at a pegboard was made from thin, narrow wood. While it looked nice, I quickly realized that the holes were spaced too far apart, and the wood needed to be heavier to prevent tipping when loaded with toy parts. So, I switched to 3/4-inch BC plywood and drilled the holes almost all the way through. The plywood worked better, but I still found that the board would tip if I tried to hang anything too heavy. It needed to be broader, heavier, and have deeper holes. Next, I tried drilling through the plywood and gluing it ...

Restocking Spiders From The Snazzy Spooks Collection

Image
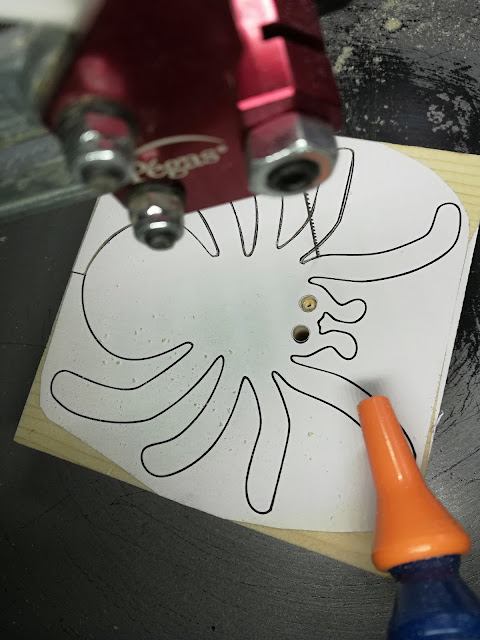
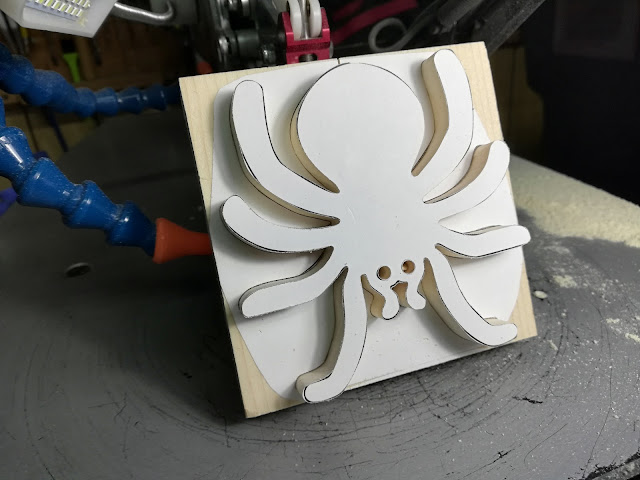
Wood Toy Spider Cutout On My EX21 Scroll Saw  Buy One of thes Spiders  Snazzy Spooks Collection I made another batch of spiders today. I cut these on my Excalibur EX21 scroll saw using a Pegas #3R  Modified Geometry blade. Quality checks are done throughout the process, and defective spiders are discarded. One spider out of five was discarded this time. The wood is pine and was prepared by sanding it before I applied the pattern. I print my patterns on a laser printer using Inkscape. I prefer to use 3m 77 adhesive to adhere patterns directly to the wood. The patterns and adhesive are easy to remove with mineral spirits, and there is no damage to the wood surface, as sometimes when I use blue painter's tape. After applying the patterns, I cut the boards into smaller pieces using a miter saw, with one spider per piece. Cutting the patterns apart is optional. I like to work with smaller pieces and find rectangular cutoffs easier to work with later. Once the adhesive is remov...

The Best Clamp for Scroll Sawing Compound Cuts

Image
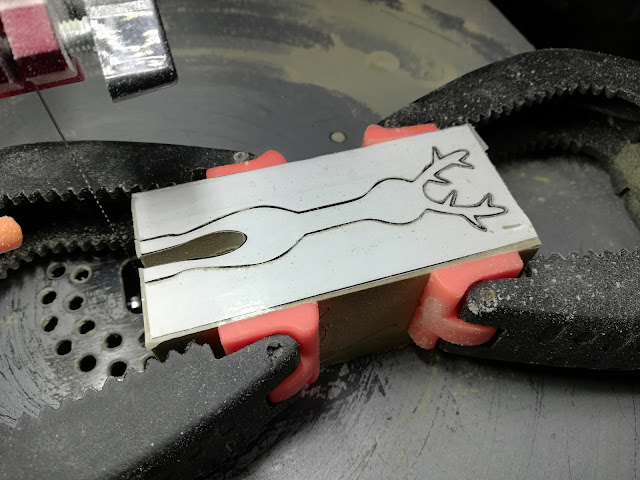
  If you are a scroller, you know how frustrating having your workpiece move while cutting can be. Especially when it comes to scrolling compound cuts, the clamp you use can make all the difference in the world when it comes to the accuracy and precision of your cuts. After trying various clamps, I discovered that the spring clamp is the best clamp for scroll sawing compound cuts. Not just any spring clamp, but one with a strong spring that can take up the slack as you cut. The larger spring clamps worked best as they stayed in place and aligned the parts. One of the main advantages of using a spring clamp for scroll sawing is that it will not damage the blade if you accidentally hit the clamp. Many spring clamps are made of plastic composites. If you should hit one of these clamps with a scroll saw blade, the blade would not be damaged. In conclusion, if you are looking for the best clamp for scroll sawing compound cuts, consider using a spring clamp with a strong spring. Look for...

Some Thoughts On Buying Your First Scroll Saw

Image
My First Scroll Saw AMT Made In Taiwan Bought New About 1983 Shop Front Page: https://odinstoyfactory.etsy.com Stay away from anything that uses pin end blades. Why? Because blade selection will be very limited. My first saw had pined blades, but it only took me a few weeks before I upgraded to use pinless blades. I used this saw for years until I picked up a use RBI Hawk for $100 that needed a little TLC. I make a lot of toys with this saw. Cutting fretwork was a challenge because the blade changes took so long. I think it cut as good or better than both of my current saws. With the right blade and hardwood, I could get smooth glass cuts. I only got rid of it after I picked up a used Excalibur EX21 because I stumbled across a video describing how easy it was to do interior cuts. Fast blade change was a game-changer for me. I had recently started selling some of my creations, and time is money. I gave the AMT saw to a friend, and it is still in use today. The only problem I ever had w...

My First Scroll Saw was an AMT 1600

Image
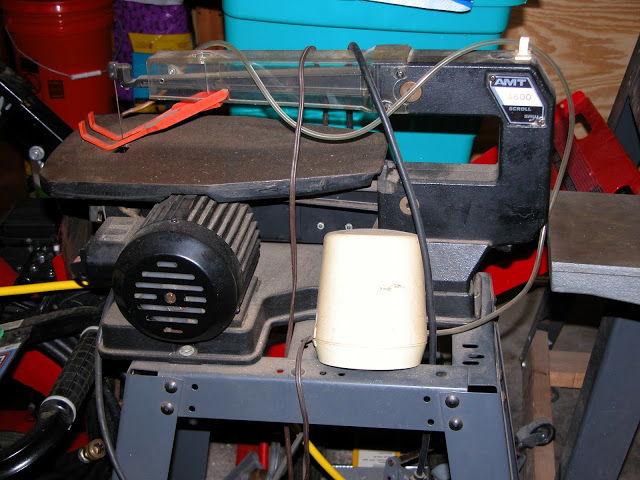
  AMT 1600 Scroll Saw My first scroll saw was this AMT 1600 purchased in the early eighties.  It used pin-end blades. I soon discovered when I started cutting fretwork that I needed a saw that uses pinless blades. I was able to purchase a modification kit that let me use pinless blades.  Changing blades and making through cuts was a bit of a chore, but I didn't know any better at the time. The saw cut great and was capable of cutting smooth glass cuts in hardwoods. I made toys, fretwork, and chess pieces using this saw. I gave it away a few years ago after purchasing an Excalibur EX21.  The blower was net to useless an was replaced with an aquarium pump. The stand was a Craftsman Universal tool stand I purchased from Sears. There are many AMT scroll saws for sale used, and they will do quite well for a beginner.  

Scroll Saw Blade Clamp Alignment

Image
Excalibur EX21 Scroll Saw Top Clamp It's essential to have both blade clamp set screws lined up perpendicular to one another. Otherwise, you get side-to-side travel in the blade. Install and tension a fine-tooth blade. Manually move the saw to the top of its stroke. Place a metal rule on the table against the right side of the blade. Manually move the arms to the bottom of the stroke. If the blade moves away from the end of the ruler, the bottom screw needs to be "deeper" in the clamp, or the top needs to be "shallower." If the blade pushes the ruler away, the bottom screw needs to be "shallower' or the clamp on the top needs to be "deeper." Repeat until there is no difference between the top and bottom of the stroke. I like to start with mine in the center. With the blade clamps in alignment and the blade square to the table, it is possible to get smooth glassy cuts.

Bandsaw Rooster/Chicken Cut With My Shopsmith Bandsaw Equipped With Carter Guide

Image
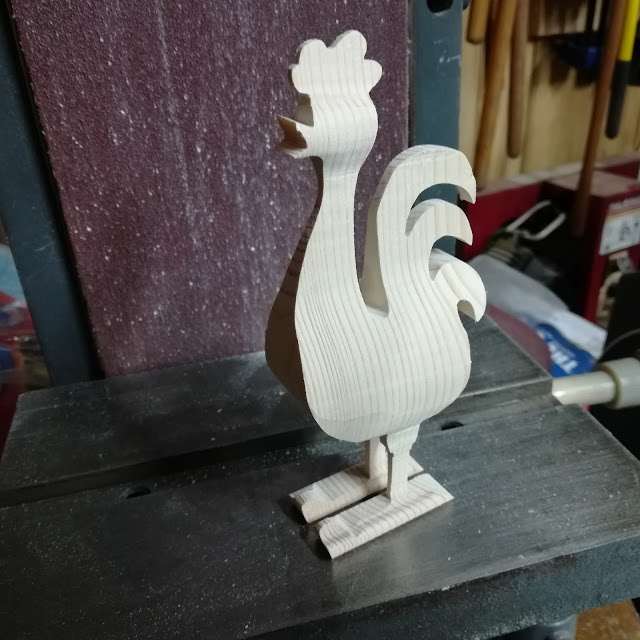
The rooster fresh off the saw. The rooster after a little sanding.   I have a Shopsmith bandsaw with Carter Guide (Shopsmith-SHS1) installed. I have had the Carter Guide installed for a while. I Played with it a lot to see what it could do and made a few somewhat simple projects. I have a project planned where I will be cutting some complex reindeer from a 4x4, and I wanted to see just how hard this would be before I decided to accept the commission. I wanted to see how complicated a cut I could make with this guide and a 1/8-inch blade. I hunted for the most complex 3D pattern I could find and came up with this chicken. The chicken is cut from a piece of construction-grade 2x4. Not once did I back up or cut any clearance to turn the blade. Cutting the chicken's wide side was slow, partly due to the fine blade and my inexperience with this sort of cut. It worked quite well. Now I have to glue up some 4x4 blocks and try a reindeer.

Installing Bandsaw Tires On A Shopsmith Bandsaw

Image
Installing Bandsaw Tires On A Shopsmith Bandsaw   Installing Bandsaw Tires On A Shopsmith Bandsaw   My first set of tires were the orange ones. They stretched and came off. I bought a pair of blue tires, and those worked well for a while and then came off and got chewed up by the blade—my fault. Putting these on was a struggle. Both times it took a couple of hours to get them on, finally. I purchased another set of the Blue Max belts. I changed the tires on my bandsaw yesterday for the third time. I finally figured out how to do it. I did not heat the tire or any of that nonsense. I discovered that you have to keep the wheel from moving and hold the belt in place. I have tried every sort of clamp you can imagine, only to have them pop off and go flying across the shop. It finally dawned on me to try hand screw clamps. Hand screws are made of wood, so no worries about damaging the wheel. You can apply a lot of pressure with these clamps. Not only did they hold the belt very wel...

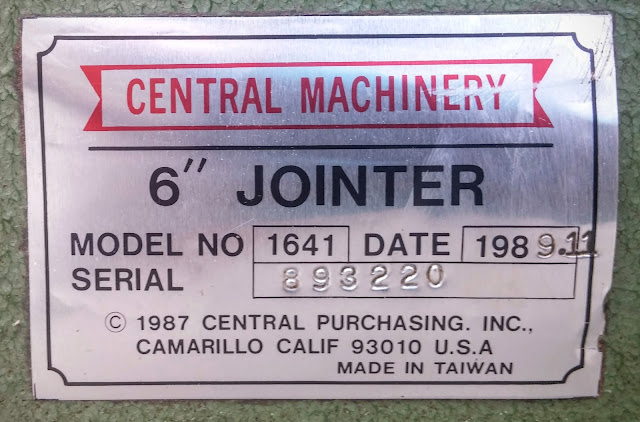
Removing Rust From A Central Machinery Jointer For Shopsmith Model 1641 Date 1988.11

Image
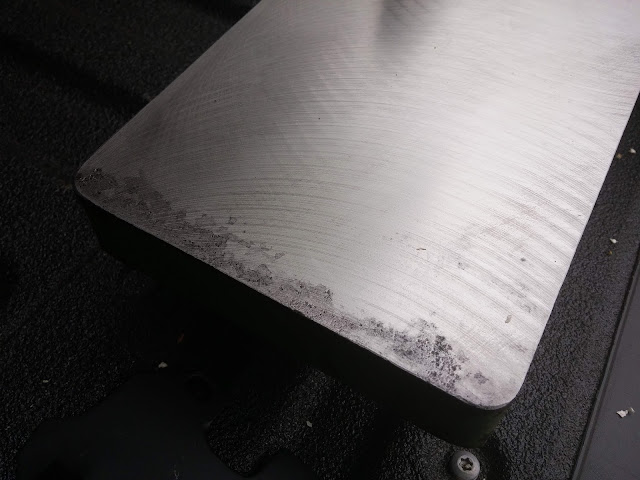
Label Central  Machinery Jointer For Shopsmith Model 1641 Date 1988.11   I purchased an older Shopsmith that came with two SPTs (Special Power Tools) still in their original boxes. A jigsaw and a six-inch jointer. Both were made by Central Machinery in Taiwan to fit the Shopsmith. I had no interest in the jigsaw and sold it immediately. Central  Machinery Jointer For Shopsmith Still In The Box It Was Shipped In The jointer box was beaten up pretty bad and showed signs of getting wet, but it was still covered with the thick oils that these tools are shipped from the factory.  New in the box but damaged. One end was sticking out and had some deep corrosion on it, and despite the oils, there was lots of surface rust. Removing Rust Using A Scotch-Brite Pad And A 1/4-sheet Sander I have been using steel wool and WD40 for many years to remove corrosion. In the past few years, I have switched to 3M Scotch-Brite pads. When removing rust from large flat surfaces such as this ...

Harbor Freight Four Inch Ratcheting Bar Clamp/Spreader

Image
  Harbor Freight Four Inch Ratcheting Bar Clamp/Spreader I use a lot of clamps. They are the first clamps of this type sold by Harbor Freight that I like. I make a lot of toys and use many small clamps. Recently I went to Harbor Freight with coupon in hand to pick up a few more of these clamps only to find that they have changed the clamp.  Harbor Freight Four Inch Ratcheting Bar Clamp/Spreader New Style There are currently three SKUs listed on their website: 68974, 46805, 62242. The ones I have the most of are SKU 68974. I have only seen only two of them. I went ahead and purchased four of the new ones. I decided that for $0.99 each, I would give them a try.   Harbor Freight Four Inch Ratcheting Bar Clamp/Spreader New Style Flashing on the Trigger   The new clamps work ok, but the build quality isn't as good. The knob on the side is tiny compared to the older version, and there is flashing on the trigger that my old one does not have. The flashing on the trigger sha...

Toymakers Shop - Cleaning Rust Off Of Castiron Tools

Image
Shopsmith Central Machinery Jointer In Its Original Water Damaged Box Used tools can be great bargains, but some times the best deals need some elbow grease applied to get them in usable condition. Often they have been neglected for a long time or stored and maintained improperly—simple things like keeping castiron waxed can go a long way to preventing rust and corrosion.  I recently purchased a Shopsmith for a low price. It was in a storage facility that had no way to test the powerhead. They needed the space cleaned out right away. There were two unidentified. Accessories still in their mangle shipping boxes, with the banding still on them. One of the boxes was very heavy, and I knew from the weight and size of the box that it was a jointer.  Shopsmith Central Machinery Jointer Label Made In 1987 When I got it home and opened the box, not only was it a jointer, but it was a rare 6-inch Jointer made by Central Machinery for Harbor Freight Tools. It wa...

My First Scroll Saw - Beginners Scroll Saw

Image
AMT Scroll Saw This was my first scroll saw and the only one I used for forty plus years. I cut a lot of projects on this saw. I purchased it new direct from AMT. It is solid cast iron, which I am sure helped a lot with the vibration. The stand I purchased from Sears after the first attempt at cutting. At the time, I did all my work outdoors, and it was evident that using a scroll saw sitting on some 2x4s stretched across sawhorses wasn't going to hack it. I made some simple projects from one of Patrick Spielman's books and learned to use the saw cutting out little animals pallet wood.  Forty years later, my grandson plays with these. I still make them using small bits of wood leftover from other projects. Handmade Wooden Toys Elephant Puzzle and Animal Cut Outs Made With My Scroll Saw I soon discovered that pin end blades were inadequate for most scroll saw work.  Fortunately, there was a kit available for my saw that let me use pin end blades. I cut lots of fr...

The best Countersink I Have Ever Used - KEO 53512 Cobalt Steel Single-End Countersink

Image
KEO 53512 Cobalt Steel Single-End Countersink, TiN Coated, 82 Degree Point Angle, Round Shank, 5/16" Shank Diameter, 1/2" Body Diameter This isn't a tool I use much for toy making, but I use it a lot for making jigs and special purpose fences. I have tried lots of countersinks for cheap ones from Harbor Freight to some expensive Bosch brand countersinks. Some cut better than others, but they all chattered. After trying one of these, the others went into the recycle bin. In some materials, this countersink will cut shavings not chips. You will get smooth, round countersinks. After using this one for a while, the others went into the recycle bin. I don't use it for metal, but you can use it for that. From the seller, " Cobalt steel tools are similar to high-speed steel, but with more cobalt for improved performance when cutting harder metals such as stainless steel or nickel alloy." The KEO 53512 Cobalt Steel Single-End Countersink co...

Replacing My Harbor Freight Bench Top Drill Press With A Grizzly G7943 Drill Press

Image
I have a harbor freight bench top drill press that I have used for several years for small bits. It is almost too small and required some fiddling to get the holes drilled in the right place. Not having a crank to raise and lower the table was a real pain. It had a keyless chuck that I found difficult to use and often would get a bit installed crooked. Harbor Freight - Central Machinery - Bench Top Drill Press I had already decided to get something different, and through a process of elimination, I chose the  Grizzly G7943 as the best solution. Grizzly G7943 Drill Press A few weeks later a used one popped up on Craig's list. Mit must have been fate. I have kept a search running for Grizzly tools on crags list for several years. Hits are rare and most things I don't want, high prices, or poor condition. This is the first drill press I have seen.  I had to buy it. According to the seller, it is about ten years old. Not a big deal since they have changed ve...