Posts

Showing posts with the label Scroll Saw

Measuring For Scroll Saw Projects

Image
  See My Shop Here Measuring is a crucial step in any scroll saw project. Whether you're working on intricate designs or simple cuts, accurate measurements are essential for a successful outcome. In my experience, every project I tackle involves precise measuring using rules or squares, and sometimes both. I can't imagine scrolling without measuring. When I need a specific piece of wood, say a 1/2-inch thick piece, I carefully go through my stash, measuring the thickness of each piece to find the right one. I also measure to ensure that a piece of wood is wide or long enough for the pattern I have in mind. Sometimes, I measure to determine if I can get two or three pieces out of a single piece of wood, optimizing the material and minimizing waste. To further assist in my measuring tasks, I use Inkscape to size patterns to fit the wood I have selected and sometimes to arrange parts. Resizing patterns to fit is an essential part of the measuring process, ensuring that the final p...

Testing Scroll Saw Blades For Cutting 2x Construction Lumber

Image
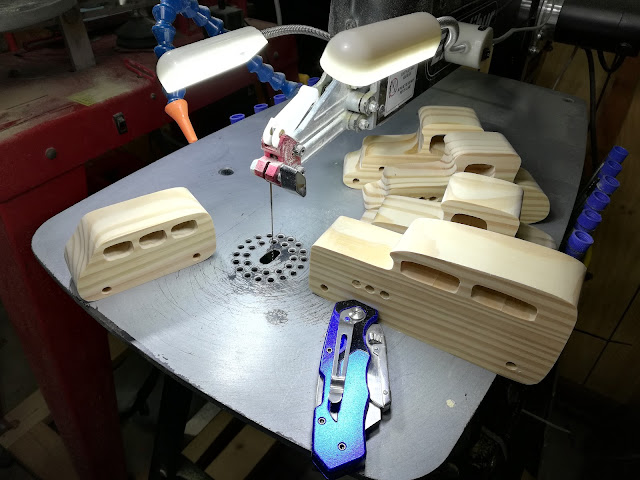
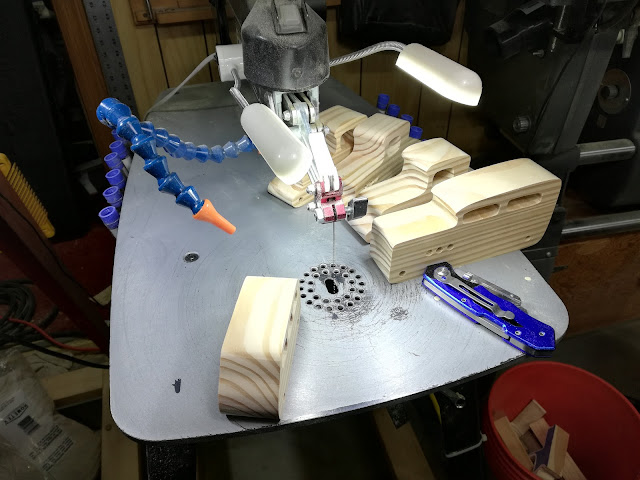
  12 Wooden Truck Bodies Cut From 2x Construction Lumber   Custom Orders Available Here I am working on a custom order for a batch of toy trucks that I cut from 2x construction lumber. I usually only make things from construction lumber one at a time. Still, this time, I am making twelve trucks all the same, and this was an excellent opportunity to experiment. If you have ever cut 2x construction lumber on a scroll saw, you know this stuff can be a pain to work with. Hard and soft grain, hidden knots, pitch pockets, and other defects are common. It is a challenging wood to scroll. I could use a band saw for this, but I prefer to cut slower and get a smoother cut. Less sanding is the goal. I have been scrolling for years and acquired a considerable collection of blades, including Olson, Flying Dutchman, Pagas, and several others whose sources I no longer know are in my blade collection. I used a variety of these blades in the test. I started with Pegas #3MGT because that was al...

What Speed Do I Need To Use When Cutting With My Scroll Saw

Image
  My Dinosaur Collection From Steve Good Blog Post Edited grammer and punctuation, https://scrollsawworkshop.blogspot.com/2024/05/welcome-gnome-scroll-saw-pattern.html Another similar question concerns setting the speed on a variable-speed scroll saw. When I get a new saw, I determine the maximum speed at which the saw cuts without too much vibration. This is often just slightly below full speed. I run at that maximum speed unless I cut fragile wood, 1/8" or thinner. The thin wood gives little resistance to the blade, making it easy to make miscuts. If that is what I am cutting, I do one of two things: slow the saw's speed down or stack cuts to add resistance. None of the above advice is an unbreakable rule. Saws are different, people get a different feel from the cuts, and blades are different. My best advice to a new scroller is to try different techniques and use what feels best. You'll learn which blades work best for various cuts, wood, and patterns with practice and ...

Choosing the Right Blade for Your Scroll Saw

Image
  See my dinosaurs here.  This is the best description I have seen for selecting a scroll saw blade. From Steve Good Blog Post Edited grammer and punctuation, https://scrollsawworkshop.blogspot.com/2024/05/welcome-gnome-scroll-saw-pattern.html If you're new to scroll sawing, you may wonder which blade to use for different wood or cuts. While there are general guidelines, the truth is that different saws, blades, and people have different preferences and skills. As an experienced scroller, I can tell you what works for me and offer some tips that may help you get started. First of all, I rarely choose a blade for the wood. Instead, I select the blade based on the pattern I'm cutting. If the pattern has small interior cuts, I use a #3 or whatever blade I need to get into the small holes. It will cut slowly, but it will cut accurately. When you see people talking about using a #9 blade to cut thicker or harder wood or a #3 for thinner or softer wood, they are talking about the ef...

The Benefits of Using Digital (SVG) To Make Paper Patterns For Scroll Sawng Projects vs Templates

Image
Creating precision toy truck parts with the help of hardboard templates and nails to mark the axle holes.     My Goimagine Shop I've been making toys and other small projects for over 40 years. When I first started, I used templates. However, everything changed when I discovered the power of Inkscape, a free and open-source vector graphics editor. When I first started using a scroll saw, I made project templates. I would trace the pattern and create a template using plastic laminates, hardboard, thin plywood, and posterboard. Eventually, I had boxes full of unorganized templates and a pain to search through. Once I had a scanner and could print paper patterns, this changed. When starting a new project, I scan the pattern and convert it to SVG format. From that point, I can make the lines any size and print as many as I want. The lines on paper are much easier to see and follow. Clear, precise lines can be essential for projects requiring precise cutting. Using Inkscape, I can ...

I Sold My RBI Hawk 220 Scroll Saw - A Little History

Image
RBI Hawk 220 Scroll Saw If I had the floor space, I might have kept it. It took about three weeks to sell on the Facebook marketplace, and I let it go for $100.00 with some blades and spare parts. I bought it several years ago, covered with dust and sitting in the back of a barn. I spent well over $100 refurbishing it, and it was my go-to saw for a long time until I purchased a used Excalibur EX-21. It didn't take long before the Hawk was collecting dust. I gave away my old AMT 16-inch saw to a friend, and the Hawk became my backup saw. My EX-21 is my backup, and a Pegas saw is my primary. While I had my AMT, EX-21, and Hawk scroll saws sitting next to each other, I experimented. I cut the pattern using the same wood and blade type on all three saws. There was very little difference in the way they cut. Surprisingly, the AMT saw produced a smoother cut than the other two. For me, blade changes trumped everything, so the EX-21 was the winner. The AMT had to go, and I began a search ...

My New Pegas Precision Scroll Saw

Image
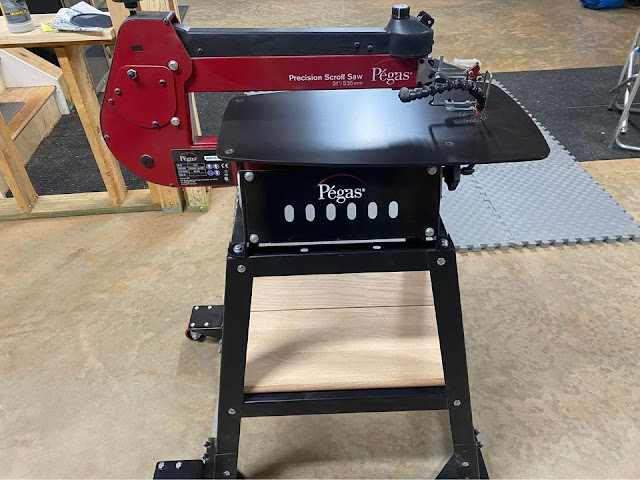
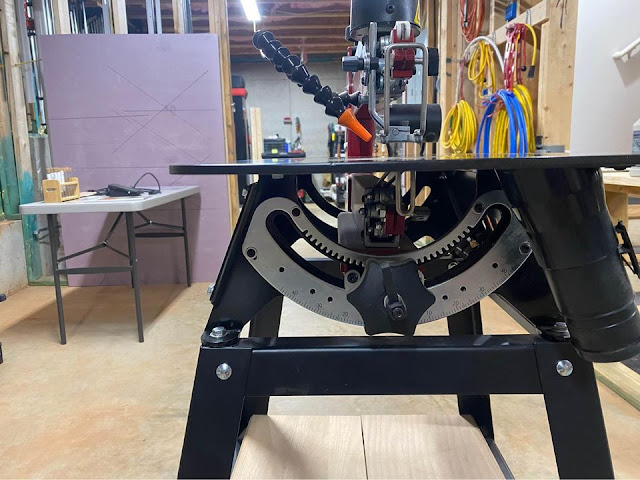
  Pegas Precision Scroll Saw   My new Pegas saw is up and running. I read the manual and could not find any place where it talked about adjusting the upper arm parallel to the table, as my EX-21 says. I did it anyway, as it was so far off I could see it without measuring. This is the first saw I have ever had that has the guards in place. There was one on the bottom as well as the top. I removed the top guard because it significantly interfered with installing the blade, and I removed the bottom guard because it banged against the table when the saw was rum at high speed. Removing the lower guard required me to remove the table to get to the screws. I replaced the screws in case they were holding something inside. While the top was off, I discovered that the thin plastic part of the dust collection was only attached to one side. I made one from a piece of magnetic sheet that I had. After waxing the bottom of the table and everything I could not get to without removing the tabl...

Why I Don't Recomend Old Used RBI Hawk Saws

Image
Name Plate From My Old RBI Hawk 220 Serial Number 1384 I have no experience with the modern RBI Hawk scrollsaws. This post is about those that have round blade holders. Once you have had to crawl around on the floor looking for one of the round holders that popped out and rolled across the floor to some hiding place, you will understand why this is the main reason I do not like the old RBI Hawk. As a woodworker, having the right tools for the job is essential to producing quality work. One of the tools that I use frequently is my scroll saw. I have two models: my old two-speed 226 Hawk and my Excalibur EX-21. In this post, I will compare the two saws and explain why I prefer the Excalibur EX-21. First, let's examine what I don't like about my old 226 Hawk. To start, the round blade holder is a nuisance. Additionally, reaching the back of the saw to release the blade tension is difficult. The blade mounting system is also a pain to use. I need a tool to hold the top clamp in pla...

Testing My EX-21 Scroll Saw Aftter Aome Major Repairs

Image
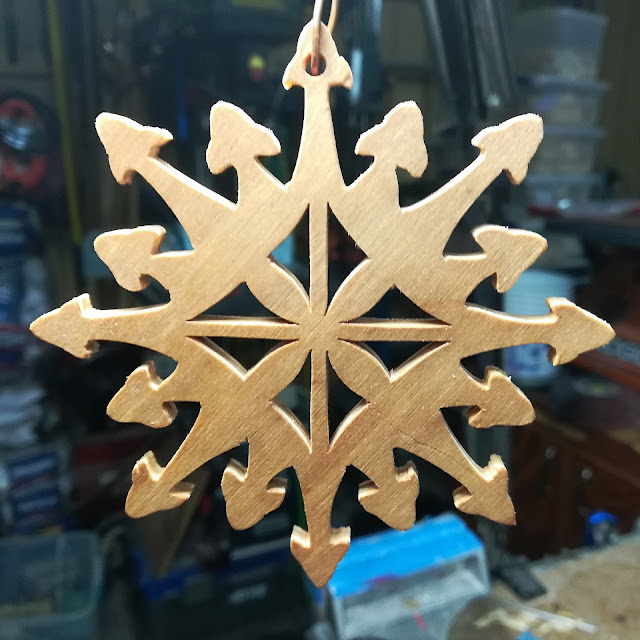
Christmas Tree Ornament Cut From Reclaimed Plywood Ornamentsi In My Shop: https://www.etsy.com/shop/odinstoyfactory?section_id=27235904 I recently had some significant problems with my scroll saw. I would up replacing the motor and the control board. The motor would randomly stop and finally quit for good. Leading up to this, it vibrated more and would break a #2 blade within seconds of starting the saw. I have been testing with  #2 blade since the repair. These are cut from a piece of 1/8-inch thick reclaimed plywood I had on hand, with the idea that if they worked out OK, I would add them to my shop. That part could have worked out better. Looking closely at the photos, you can see several places where the veneer is coming off. And a few spots where the glue from the next layer is showing through. They are dipped in a 50/50 solution of clear shellac as an experiment to see how well this works.    

Restocking Spiders From The Snazzy Spooks Collection

Image
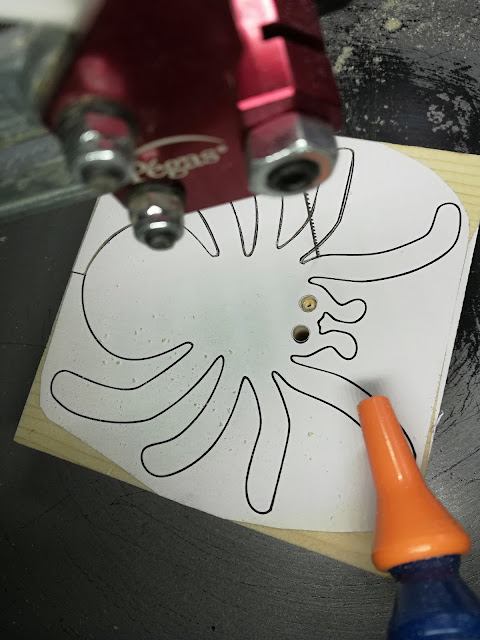
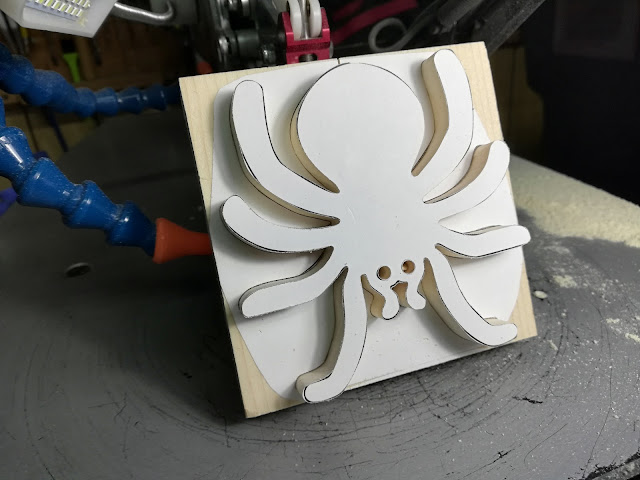
Wood Toy Spider Cutout On My EX21 Scroll Saw  Buy One of thes Spiders  Snazzy Spooks Collection I made another batch of spiders today. I cut these on my Excalibur EX21 scroll saw using a Pegas #3R  Modified Geometry blade. Quality checks are done throughout the process, and defective spiders are discarded. One spider out of five was discarded this time. The wood is pine and was prepared by sanding it before I applied the pattern. I print my patterns on a laser printer using Inkscape. I prefer to use 3m 77 adhesive to adhere patterns directly to the wood. The patterns and adhesive are easy to remove with mineral spirits, and there is no damage to the wood surface, as sometimes when I use blue painter's tape. After applying the patterns, I cut the boards into smaller pieces using a miter saw, with one spider per piece. Cutting the patterns apart is optional. I like to work with smaller pieces and find rectangular cutoffs easier to work with later. Once the adhesive is remov...

Scroll Saw Footswitch

Image
Scroll Saw Footswitch   I have a foot pedal on my EX21 mounted on the mobile base. It is situated so that my relaxed left foot depresses the switch when sitting at the saw. I did not do this by design. I did not like it on the floor because it kept moving around every time the cord got bumped. I added a power strip to the back of the stand to have a convenient place to plug in my lights and turn everything on at once. As I was tying up all the wiring, I decided to mount the pedal and tie down all the wiring, so it didn't move around. Totally by accident, I came up with a workable solution for me. I was about ready to give up on foot peddles. I don't know what kind of switch it is. It came with the EX21 when I bought it. My RBI Hawk does not have a peddle, and it does not bother me to use it without one, perhaps because I used scroll saws for years without a footswitch.

Some Thoughts On Buying Your First Scroll Saw

Image
My First Scroll Saw AMT Made In Taiwan Bought New About 1983 Shop Front Page: https://odinstoyfactory.etsy.com Stay away from anything that uses pin end blades. Why? Because blade selection will be very limited. My first saw had pined blades, but it only took me a few weeks before I upgraded to use pinless blades. I used this saw for years until I picked up a use RBI Hawk for $100 that needed a little TLC. I make a lot of toys with this saw. Cutting fretwork was a challenge because the blade changes took so long. I think it cut as good or better than both of my current saws. With the right blade and hardwood, I could get smooth glass cuts. I only got rid of it after I picked up a used Excalibur EX21 because I stumbled across a video describing how easy it was to do interior cuts. Fast blade change was a game-changer for me. I had recently started selling some of my creations, and time is money. I gave the AMT saw to a friend, and it is still in use today. The only problem I ever had w...

My First Scroll Saw was an AMT 1600

Image
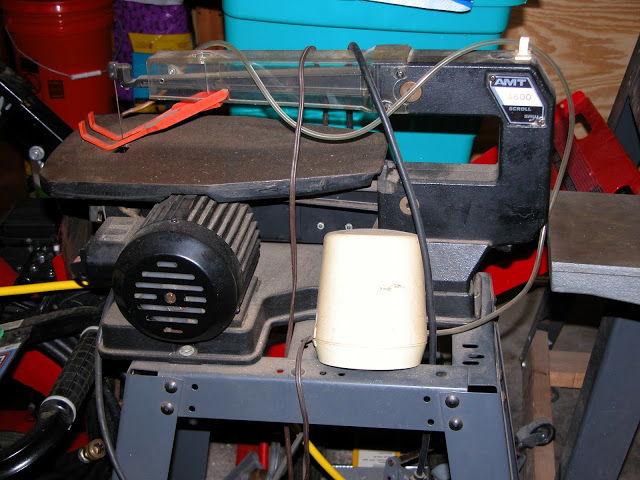
  AMT 1600 Scroll Saw My first scroll saw was this AMT 1600 purchased in the early eighties.  It used pin-end blades. I soon discovered when I started cutting fretwork that I needed a saw that uses pinless blades. I was able to purchase a modification kit that let me use pinless blades.  Changing blades and making through cuts was a bit of a chore, but I didn't know any better at the time. The saw cut great and was capable of cutting smooth glass cuts in hardwoods. I made toys, fretwork, and chess pieces using this saw. I gave it away a few years ago after purchasing an Excalibur EX21.  The blower was net to useless an was replaced with an aquarium pump. The stand was a Craftsman Universal tool stand I purchased from Sears. There are many AMT scroll saws for sale used, and they will do quite well for a beginner.  

Scroll Saw Blade Clamp Alignment

Image
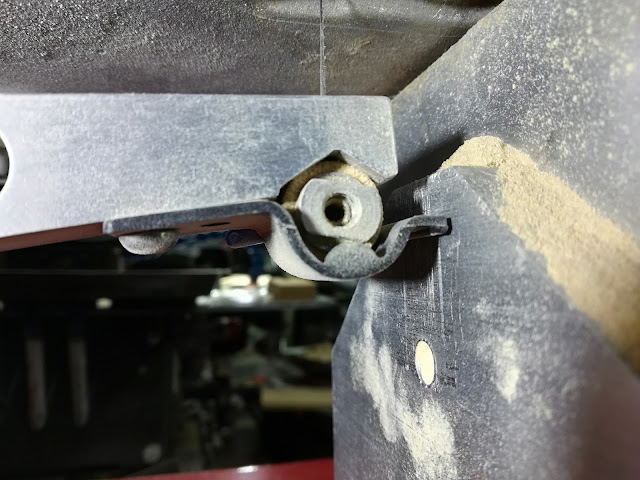
Excalibur EX21 Scroll Saw Top Clamp It's essential to have both blade clamp set screws lined up perpendicular to one another. Otherwise, you get side-to-side travel in the blade. Install and tension a fine-tooth blade. Manually move the saw to the top of its stroke. Place a metal rule on the table against the right side of the blade. Manually move the arms to the bottom of the stroke. If the blade moves away from the end of the ruler, the bottom screw needs to be "deeper" in the clamp, or the top needs to be "shallower." If the blade pushes the ruler away, the bottom screw needs to be "shallower' or the clamp on the top needs to be "deeper." Repeat until there is no difference between the top and bottom of the stroke. I like to start with mine in the center. With the blade clamps in alignment and the blade square to the table, it is possible to get smooth glassy cuts.

DIY Scroll Saw Sander

Image
DIY Scroll Saw Sander Mounted ON AN Excalibur EX21 Scroll Saw Scroll saw sanding blades are made by several companies, and you can find them many places. They are a bit pricy and don't fit some scroll saws without modification. These are very easy to make. All you need to make a sander for your scroll saw is an old saw blade, a piece of cloth-backed sandpaper, and some carpet tape. Cut two strips of sandpaper about 1/4-inch wide. Put carpet tape on the back and make a sandwich with an old scroll saw blade in the center. I tried paper-backed sandpaper.  It didn't hold up well. I have also tried various glues to hold them together, and nothing works as good as the carpet tape. You will not get square edges sanding with this method. There will always be a slight curve.

Use Sewing Machine Lights For Your Scroll Saw

Image
I recently purchased two magnetic sewing machine lights to use on my scroll saw. I have been quite pleased with them. Bright white light, and they don't move. I highly recommend these. They come with steel disks that you can stick on to any smooth surface, so the magnet mount will work even on aluminum, plastic, glass, or another smooth surface. These cost me $12 US each. Well worth the money. Excalibur EX21 Scroll Saw Sewing Machine Lights Hot Rod Freaky Fords Mini-Van Yellow Pine Wood Toy Cars Excalibur EX21 Scroll Saw Sewing Machine Lights Hot Rod Freaky Fords Mini-Van Yellow Pine Wood Toy Cars I cut the toy cars in the photos from a piece of southern yellow pine using this scroll saw. I used several different size blades, and other than the coarser blades cutting a little faster, I could not see much difference. 
My First Scroll Saw - Beginners Scroll Saw

Image
AMT Scroll Saw This was my first scroll saw and the only one I used for forty plus years. I cut a lot of projects on this saw. I purchased it new direct from AMT. It is solid cast iron, which I am sure helped a lot with the vibration. The stand I purchased from Sears after the first attempt at cutting. At the time, I did all my work outdoors, and it was evident that using a scroll saw sitting on some 2x4s stretched across sawhorses wasn't going to hack it. I made some simple projects from one of Patrick Spielman's books and learned to use the saw cutting out little animals pallet wood.  Forty years later, my grandson plays with these. I still make them using small bits of wood leftover from other projects. Handmade Wooden Toys Elephant Puzzle and Animal Cut Outs Made With My Scroll Saw I soon discovered that pin end blades were inadequate for most scroll saw work.  Fortunately, there was a kit available for my saw that let me use pin end blades. I cut lots of fr...

Converting Bitmap Patterns to Scalable Vector Graphics (SVG)

I'm not an expert with either of the software packages discussed here. Once I know what I want to do I ask the Google oracle for help and it always provides. If you have questions, you should ask Google. There are a lot of videos on YouTube, and some books are available. The learning curve is steep. If you are only going to make one toy and don't intend to make batches or modify the patterns, it may not be worth the effort to learn about these tools. This isn't a tutorial. It is a simple explanation of how I use Gimp and Inkscape in my toymaking. The first step I take when making something for the first time is to convert the patterns to SVG. I load the bit map patterns into Gimp and clean them up. The bitmaps get copied into Inkscape and converted into the SVG format. Why? First I get sharp, precise lines when you print the patterns. When you print from bitmaps the edges of the lines are jagged and fuzzy. If you want to enlarge the pattern, it gets worse. With the ...

Some Thoughts on Scroll Saws

Image
I started with a cheap Taiwanese cast iron saw. It immediately became apparent that the pin end blades were not going to hack it. I installed a modification that let me use good quality pinless blades and I was on my way. I made some nice Victorian fretwork pieces with that setup. Blade changes were difficult. Oak Scrollsaw Fretwork Shelf Cut On An AMT Castiron Scrollsaw These were made in Taiwan and sold under several different brands. They also made several models. There are a lot these scroll saws still available on the used market. You can pick one up for $50 or even less. Pinless upgrades were still available last time I looked. The blade changing left a lot to be desired and the built-in blower was worthless. I replaced the blower with an old aquarium pump. It's a good idea to have a few extra blade clamps. When a blade breaks the clamps sometimes flying across the shop. As far as cut quality goes it cut very well. Glass smooth surfaces were easy to get in har...