Posts

Showing posts from November, 2018

New Etsy Listing - Handmade Wooden Toy Car, Hot Rod 1927 T-Bucket From the Hot Rod Freaky Ford Series

Image
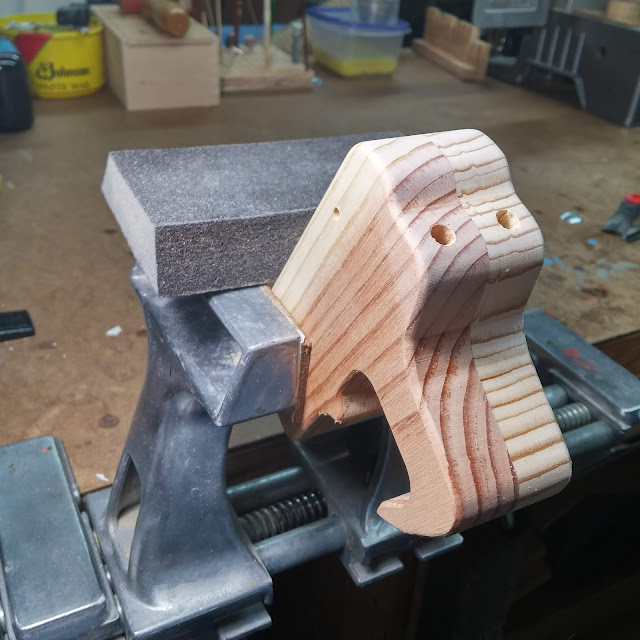
Handmade Wooden Toy Car, Hot Rod 1927 T-Bucket   My first peg doll. It came out much better than I expected. I had this car and one other collecting dust waiting for me to get around to painting a peg doll. Painting inside the hole is a problem. It's hard to do and get it to look good, and it makes the hole smaller. The wood swells a little from the paint and its hard to sand. If I paint after drilling the hole, I have trouble keeping paint out of the hole. I finally decided to try drilling the hole after painting. After trashing a couple of paint jobs, I figured out that the way to drill them out is to wait until the car is assembled and painted. I put blue painters tape over the area where I need to drill and use a good quality brad point or Forstner bit that is very sharp. Waiting until the car is finished ensures the hole is vertical. No jig is required to get the hole straight. I hold it by gently clamping with a padded hand screw.  

New Etsy Listing - Handmade Toddler Puzzle, Rooster, Chicken, Very Easy Assembly

Image
Handmade Wooden Toy Puzzle For Toddlers - Rooster - Chicken Intended as a simple puzzle for kids and toddlers three years and older just getting into puzzles. The Cat has only four parts. It is more difficult than the White Rabbit sold separately but still quite simple. It is also a freestanding stacking toy. It is a bit tricky to do but, My four-year-old grandson can do it. These puzzles have been thoroughly grandson tested for playing fun and durability.  Handmade Wooden Toy Puzzle For Toddlers - Rooster - Chicken Tray puzzles are much easier to assemble and store than your typical wooden puzzle. I think they are much more comfortable for children. The pieces are painted only on one side to make it easier for kids to put together. The edges and backs of the pieces are unfinished. Handmade Wooden Toy Puzzle For Toddlers - Rooster - Chicken Every part of the puzzle is non-toxic. I made the tray and puzzle parts from premium grade pine, not construction

Replacing My Harbor Freight Bench Top Drill Press With A Grizzly G7943 Drill Press

Image
I have a harbor freight bench top drill press that I have used for several years for small bits. It is almost too small and required some fiddling to get the holes drilled in the right place. Not having a crank to raise and lower the table was a real pain. It had a keyless chuck that I found difficult to use and often would get a bit installed crooked. Harbor Freight - Central Machinery - Bench Top Drill Press I had already decided to get something different, and through a process of elimination, I chose the  Grizzly G7943 as the best solution. Grizzly G7943 Drill Press A few weeks later a used one popped up on Craig's list. Mit must have been fate. I have kept a search running for Grizzly tools on crags list for several years. Hits are rare and most things I don't want, high prices, or poor condition. This is the first drill press I have seen.  I had to buy it. According to the seller, it is about ten years old. Not a big deal since they have changed ver

Bad Bob's Custom Motors - Handmade Wooden Toy Car Bodies Completed

Image
Bad Bob's Custom Motors - Handmade Wooden Car Bodies - Coupe & Sedan Most of the sanding was done with belt sanders. Delta Model 31-340 1x48-inch Belt Sander and my Shopsmith 6x48-inch belt sander. I consider belt sanders essential to a toy makers shop. Before sanding, I rounded over the corners with a clean, sharp 1/8-inch radius round over bit paying very close attention to grain direction to prevent as much tear out as I can. It's ok to back route when doing this because the cut is so small. You can do the round over by hand with sandpaper but the router is more consistent and faster. The rest of the sanding was done by hand using various sanding tools I have made and fingernail file scraps. Delta Model 31-340 1x48 inch belt & 8 Inch Disk Sander Shopsmith - 6x48" Belt Sander

Sanding Fenders Is Done

Image
If it were not for my power tools, I would still be sanding these fenders. I used my Shopsmith belt sander for the front and back of the fenders. One slip with small parts and it's all over for that one. Very light and very careful is the name of the game here. Next, I used the 1 inch Delta belt sander for the outside curves. The belt is flat, but with a little practice, you can easily sand outside curves. There isn't much chance of breaking the piece, but even with a 240 grit belt, it can be very aggressive. If you go to fast, slip, or push too hard, it's easy to ruin a part. I sanded the inside curves with a spindle sander.  ASgaina light touch is required. Approach the spindle at the wrong angle or get a little too aggressive and it will take the part away from you and throw it across the room. Slow and gentle is the name of the game here. There are a few places that require hand sanding. The spots where the machines can't reach.  I have an assortme

What is the best primer sealer for MDF?

Image
Zinsser B-I-N White Shellac-Based Interior/Spot Exterior Primer and Sealer Is what I find works best. I originally purchased this to use for a white base to make the color pop. Previously I use white acrylic paint on top of shellac. It worked pretty good but using the shellac based primer I get a white base and sealer in one step. Shellac is compatible with just about any finish. It will seal pine knots. This primer is used for a sealer when repairing smoke damage after a fire. I just did a test on an MDF Play Pal minivan. One coat was all it took. I get it at  Home Depot in the paint department.  

Using Double Sided Tape For Sandiing Duplicate Wooden Toy Car Parts

Image
Using Double Sided Tape to Hold Wooden Toy Car Fenders Together for Sanding I use double sided carpet tape to hold these fenders together for sanding so they will be as close to identical as I can make them. I use a 1x42 inch belt sander and a delicate touch for the outside curves and a spindle sander for the inside curves.  The rest of the edges are done by hand using files and sandpaper. I'm not making any attempt to color match the wood. It's going to be sealed and painted, so the color doesn't matter.  The little bit of purple paint will get sanded off. Because these are made from pine construction lumber, they are very easy to break while sanding. If I break a fender, it gets tossed into the kindling bucket, and I need to make another pair. Once the fenders get glued on, they are quite strong. Below is a completed toy car. Handmade Wooden Toy Car -  Bad Bob Custom Motors Coupe - Green and Yellow

Sanding The Last Car Body

Image
Handmade Wooden Car Body - Final Hand Sanding I started this batch of cars almost a year ago and got sidetracked by other things. I originally started this as a project for my grandson after he asked me to make one he saw in a photo. John Leman at ToyMalingPlans.com made a set of plans for me. Here is the original Bad Bob's Custom Motors Coupe. Hand Made Wooden Toy Car - Bad Bob's Custom Motors Coupe - Green and Yellow Etsy shop: http://odinstoyfactory.etsy.com #odinstoyfactoy #Tallahassee #Florida #handmade #handcrafted #woodentoys