Posts

Showing posts from January, 2024

Wooden Toy Truck Martin Motors Antique Car Carrier Build Part 10 Ready To Sand

Image
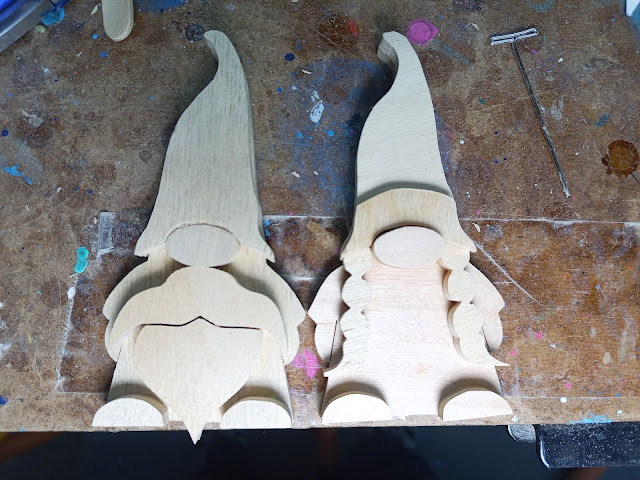
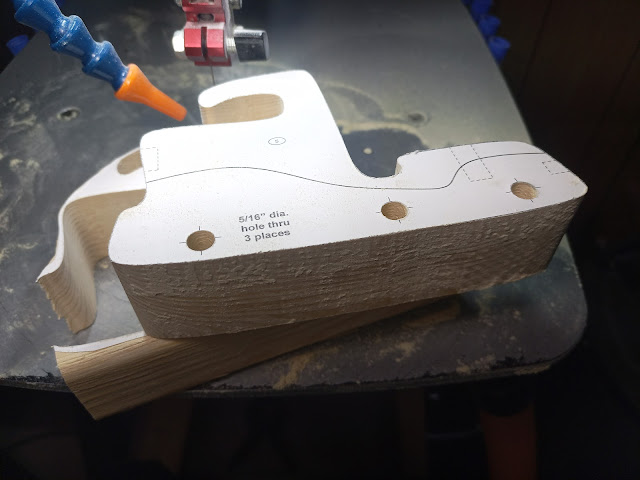
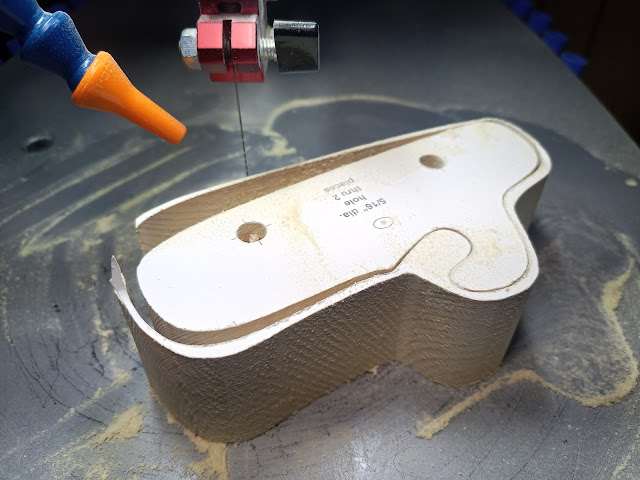
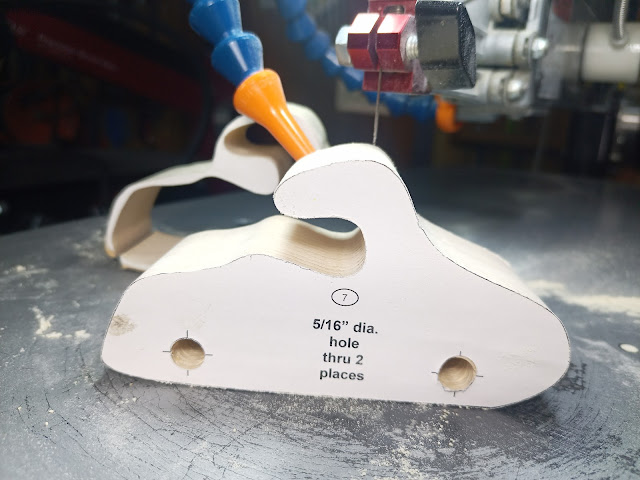
Handmade wooden toy truck, Martin Motors antique car carrier. All parts are cut and ready for pattern removal and sanding. All of the parts are cut. Before I remove the patterns, I like to true up any spots on the edges that need it. I use a belt sander (6-inch and one-inch wide belts) for the flat areas and outside curves, a rotary tool, hand sanding, and sometimes files for tight inside curves. I have an oscillating spindle sander, but the smallest radius it can sand is 1/2 inch. Once this is done, I remove patterns and sand the sides. Leaving the patterns in place while sanding the edges helps me to detect flaws and not overshoot the edges of the pattern. Since these are cut on a scroll saw, the edge sanding at this point is more of a shaping operation than smoothing.  https://odinstoyfactory.com/1632377592/ #odinstoyfactory #handmade #woodtoys #madeinusa #madeinamerica

Gnome Couple Ready For Sanding and Finishing

Image
Handmade gnome couple ready for a bit of sanding and a coat of shellac.   I cut these using my Excalibur Ex-21 scroll saw from plywood and glued all the pieces together. They make a cute Christmas tree ornament but are free-standing and can be displayed anywhere on a flat surface. This couple will be finished with shellac, but they could be painted. Painting is more complicated and time-consuming, so I don't want to do that. If you want to purchase a pair of gnomes, contact me through my shop and place a custom order. Size and finish will determine pricing. https://odinstoyfactory.com/ #odinstoyfactory #handmade #woodtoys #madeinusa #madeinamerica

Wooden Toy Truck Martin Motors Antique Car Carrier Build Part 9 The Tuck Bed

Image
The tuck bed freshly cut with the pattern still attached sitting on my scrollsaw. This is the trailer for the Martin Motors Antique Car Carrier. The pattern had to be printed on two pages and spliced together, which presents a problem as it prevents the solvent from removing the glue under the tape I use to hold the pattern to the wood. The long and straight cuts are the most challenging part of cutting the trailer, and it's easy to go off the lines if you get distracted. If this happens, it may not be fixable if you go too far in the wrong direction. I could cut outside the line and sand to the line, but at that point, I might as well be using a bandsaw.  https://odinstoyfactory.com  #odinstoyfactory #handmade #woodtoys #madeinusa #madeinamerica

Miniature Female Gnome Glued and Clamped

Image
Handmade Wooden Female Gnome Glued And Clamped   I used a Pittsburg bar clamp for the nose. I purchased many of these back when I could get them for $0.99 each. Today, they are $1.99. Double the price; I haven't seen these on sale for a long time. They are great little clamps for small light work. I have found that I need to keep the bar clean, or they will slip. When I get new clamps, I usually wax them to prevent glue from sticking to them and help prevent rust. I waxed the first Pittsburg bar clamps I purchased and thought they didn't work because they slipped. I don't know where I got the idea to clean off the wax, but wiping the bar down with mineral spirits fixed the slipping.  https://odinstoyfactory.com/ #odinstoyfactory #handmade #woodtoys #madeinusa #madeinamerica

Wooden Toy Truck Martin Motors Antique Car Carrier Build Part 8 Cutting the Tractor

Image
Wooden Toy Truck Martin Motors Antique Car Carrier Tractor On A Scroll Saw You might think that soft pine would be easier to cut with a scroll saw on the surface. However, many hardwoods are much easier to cut. The resins in the pine tend to make the sawdust stick to everything and make it more difficult for the blade to clear the cut. Cutting the tractor was slow going with my scroll saw. However, the time saved in sanding makes it worth the effort. I would much rather cut slowly than sand. The line in the pattern's center splits the tractor in half so the two pieces can be painted and glued back together. I only use one type of finish, so this cut is finished. https://odinstoyfactory.com #odinstoyfactory #handmade #woodtoys #madeinusa #madeinamerica

Miniature Male Gnome Glued and Clamped

Image
  Wooden Miniature Male Gnome Glued and Clamped With Spring Clamps These Pittsburgh spring clamps are used in my shop; I have over 100 of them, and they are perfect for gluing and clamping this miniature male gnome and other small items. They are cheap and handy. I resized the gnome from a Steve Good pattern for this project. And cut it from a random piece of plywood I had. It will be sanded and finished with shellac. https://odinstoyfactory.com/ #odinstoyfactory #handmade #woodtoys #madeinusa #madeinamerica

Wooden Toy Truck Martin Motors Antique Car Carrier Build Part 7 Third Car Off The Scroll Saw

Image
The third wooden toy car has been finished cutting on the scroll saw. I understand why the person I watched roughed out their toy parts on the band saw before cutting them with the scroll saw. When the thin strip pulls away from the cut line, it gives more room for the scroll saw blade. This clears the sawdust better and reduces the chance of burning, which is a common problem in some woods, especially cherry. Rough cutting the piece is also necessary in some cases to fit the toy in the drill press. When the wood is too large for the bandsaw, a handheld jigsaw can be used to get the pieces down to size. However, using the jigsaw doesn't allow getting as close as the bandsaw does.   https://odinstoyfactory.com/ #odinstoyfactory #handmade #woodtoys #madeinusa #madeinamerica

Wooden Toy Truck Martin Motors Antique Car Carrier Build Part 6 Recutiung Because Of A Knot

Image
Wood toy car body freshly cut on the scroll saw. Embarking on a woodworking project can be rewarding, filled with creativity and the satisfaction of creating something tangible. However, as any woodworker knows, each project comes with its unique set of challenges. In this blog post, we delve into the journey of crafting the second car off the scroll saw, exploring the intricacies of the process and the valuable lessons learned along the way. Woodworking often involves dealing with knots, those natural imperfections that add character to the material. I confess to usually overlooking tiny pin knots, but this particular one was different – large and seemingly prone to coming out. I had to recut this one because I discovered a bad knot after cutting. I did not check the back of the wood when I was attaching the pattern. I can fix knots so they do not come out, but the additional time and expense are worth the effort. There are a few projects where the knot is part of the design that look

Wooden Toy Truck Martin Motors Antique Car Carrier Build Part 5 Cutting A Car Body On A Scroll Saw

Image
1.5 inch thick wood toy car body being cut on an Excalibur EX-21 Scroll Saw Cutting the first car on the scroll saw. Notice how smoother the cut is than the band saw cut. I can't get glass smooth cuts with this type of wood, but the cut can be glossy smooth with some hardwoods. Roughing them out on a bandsaw can help a lot as the blade has minimal binding, and the pieces are much easier to handle both on the scroll saw and the drill press. I like using sold wood for this kind of project instead of gluing up wood to make it thick enough. Cutting wood this thick on a scroll saw is challenging.   http://odinstoyfactory.com #odinstoyfactory #handmade #woodtoys #madeinusa #madeinamerica

Wooden Toy Truck Martin Motors Antique Car Carrier Build Part 4

Image
Drilling axle holes in a handmade wooden toy car using a drill press and a high-quality brad point drill bit.   To drill smooth strait axle holes, it is essential to use a drill press with high-quality drill bits. I prefer Brad Point bits for this. The HSS Lipped Imperial Brad-Point Drills sold by Lee Valley are excellent. The old Shopsmith bits are also excellent if you can find them in good condition. I set up my drill press so the point of the bit touches the table when the quill is fully extended. Proper speed is also essential. Use the chart that came with your drill press. When the hole is drilled, a tiny hole will be on the backside. Remove any chips,  locate the hole, and use it as a guide to finish the hole from the backside. If all goes well, you will have a clean strait hole with little or no tear out.