Posts

Showing posts with the label Finishing

Notes on Toy Finishes

Image
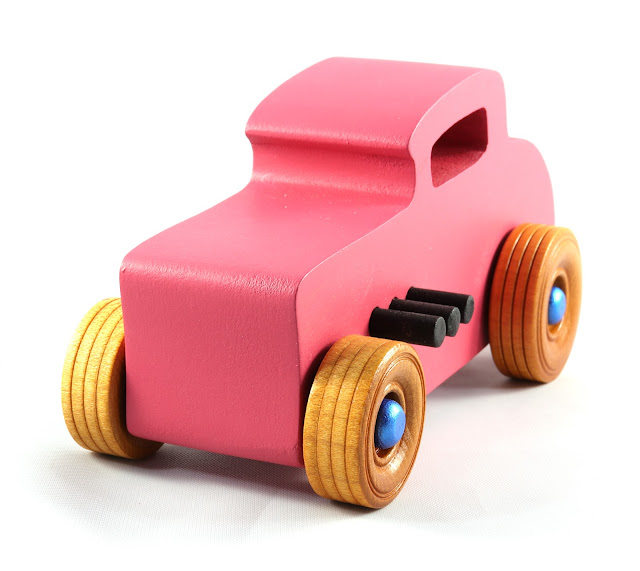
You can see some of my toys here.  I am not an expert in finishing. These notes are based on my years of learning. All paints and finishes sold in the US are considered nontoxic when fully cured. When something is dry, you can touch it without getting paint on your fingers. But when it's cured, all the volatiles have dissipated, and the finish has hardened. A finish can take hours, days, or weeks to cure fully. Nontoxic doesn't mean you should eat it or that there is no long-term harm if you do. It simply means it won't send you to the emergency room if ingested. For an easy, clear finish, you can use butcher block conditioner, a combination of mineral oil and wax. Many toy makers use a mineral oil and beeswax blend for a simple, fast finish. However, there is no cure time, and it is not a durable finish. Polyurethane is an excellent finish that adds a slight amber tint and enhances the wood grain. However, it takes a long time to cure, typically two weeks or more, and requ

Painting Handmade Wood Toys: Tips and Considerations for Using Acrylic Paint

Image
Handmade Wood Toy Cars Hot Rod Freaky Fords Being Painted With Acrylic Baby Blue Paint Hot Rods https://www.etsy.com/shop/odinstoyfactory?search_query=Hot+Rod Toy Cars https://www.etsy.com/shop/odinstoyfactory?section_id=34638962 Toy Trucks https://www.etsy.com/shop/odinstoyfactory?section_id=34653279 Painting handmade wood toys can be a fun and creative way to add color and personality to your creations. While many types of paints exist, acrylic paints are often favored due to their versatility and ease of use. This blog post will discuss some tips and considerations when using acrylic paint to paint handmade wood toys, explicitly focusing on drying time vs. cure time. First, let's briefly review the difference between drying and cure times. Drying time refers to the amount of time it takes for the solvent in the paint (in the case of acrylics, water) to evaporate, leaving behind a dry paint film. Curing and drying are usually measured in hours or days and vary depending on facto

Choosing the Right Finish for Wooden Toys: Finishing Toys With Polyurethane A Toymaker's Perspective

Image
Handmade Wood Toy Monster Truck Made From Oak Poplar and Birch Hardwoods and Finished with Satin Polyurethane, Amber Shellac, and Metallic Saphire Blu Acrylic Paint Toy Monster Truck https://www.etsy.com/listing/496711514/   Toy Trucks https://www.etsy.com/shop/odinstoyfactory?section_id=34653279 Toy Cars https://www.etsy.com/shop/odinstoyfactory?section_id=34638962 As a toymaker, I understand that choosing the right finish for wooden toys is crucial to ensuring their longevity and beauty. Each finish has unique qualities and properties that can enhance the natural beauty of the wood while protecting against wear and tear. One finish that I often use is satin polyurethane. This finish is incredibly durable and repels water better than most other finishes. Moreover, it adds an eye-catching glow to the wood grain. However, it's important to note that I use the traditional solvent-based polyurethane, not the water-based version, which tends to be less durable and transparent. Polyuret

Dry vs. Cure: Understanding the Difference in Coatings and Finishes

Image
  Toy Car Wheels Finished With Fully Cured Shellac and Ready To Be Mounted   My Shop Fron Page http://odinstoyfactory.etsy.com Dry and cure are two terms commonly used in the context of coatings and finishes. While these terms are often used interchangeably, they refer to two different processes. Dry refers to the point at which a coating or finish no longer feels tacky or sticky to the touch. When a finish is dry, the solvents or water in the coating have evaporated, leaving behind a film on the surface. However, just because a finish is dry does not necessarily mean it has cured. Cure refers to the process by which a coating or finish reaches its maximum hardness and durability. This process can take longer than simply drying, involving chemical reactions between the molecules in the coating or finish. During curing, the finish may change color or texture as it hardens and becomes more durable. Generally, the time it takes for a coating or finish to dry is much shorter than the time

How Temperature and Humidity Affect Finish Cure Times

Image
  Wheels For A Toy Car Curing After A Heavy Coat Of Amber Shellac   My Shop Front Page https://odinstoyfactory.etsy.com Temperature and humidity are two important factors that can significantly affect the curing process of finishes. The curing process is the time it takes for a finish to completely dry and harden, and it is essential for achieving a durable and long-lasting finish. This blog post will discuss how temperature and humidity can affect finish cure times. Temperature Temperature plays a critical role in the curing process of finishes. Warmer temperatures will accelerate the curing process, while colder temperatures will slow it down. This is because the chemical reactions during the curing process are temperature-dependent. When the temperature is too low, the curing process will take longer and may not even occur. Low temperatures can cause the solvents in the finish to evaporate too slowly, leading to a gummy or sticky finish. On the other hand, high temperatures can caus

Painting Toys With An Airbrush: What airbrush do you recommend?

Image
  Two of my Badger Anthen 155 Airbrushes     My Etsy Shop If you're thinking about painting toys with an airbrush, you may wonder what airbrush to use. One option that we highly recommend is the Badger 155 Anthem airbrush. This airbrush is versatile and can handle just about any paint or finish used for toy making. It's also a bottom-feed airbrush. There are Badger airbrushes that are top feed. The Badger 360 can be used for top or bottom feed. If you only need a small amount of paint, the top feed option is excellent because it allows you to use just a few drops at a time. The Badger airbrushes are made in the USA and come with excellent support from the manufacturer. If you have any questions or need help with your airbrush, the team at Badger is there to help. Overall, if you're looking for a reliable, high-quality airbrush for painting toys, the Badger 155 Anthem is a great choice. It's reliable, easy to use, and will give you great results every time. Badger 155  -

 Airbrushing for Toy Making: Which air compressor do I use?

Image
Visit My Etsy Store One important thing to note is that any compressor will work for airbrushing as long as you can regulate the pressure and filter the air. It is worth noting that none of the airbrush manufacturers make their compressors. If they do sell compressors, they are usually rebranded products from China. I have successfully used both a standard two-stage tank compressor and a Harbor Freight Central Pneumatic compressor. I even know someone who used a spare tire as an air source to paint a show car in their driveway (they used to sell an adapter that fits onto a valve stem to make this possible). The Harbor Freight compressor is a reliable and cost-effective option. It is quiet and portable, and it even comes with an airbrush. While I have no personal experience with the Harbor Freight airbrush, I have heard mixed reviews about its performance. It might work if you only plan on spraying paints explicitly designed for airbrushes. However, I often spray cheap acrylics, craft p

Spray Booth For Painting Toys

Image
Spray booths need venting outside., Unless you like brain damage. I researched this subject a while back and experimented with some cardboard box with a fan and filters. Even with the box fan and filters, I got paint dust all over the shop. This method doesn't filter out fumes. I was using acrylic paint, so I was not concerned about fire. I would not use this configuration to spray solvent based finishes. If you re spraying outdoors that is a different matter altogether. I know someone who lets his the truck tailgate down and covers the back of his truck with a blue tarp to use for painting.  I have a table I make from saw horses to use when painting outdoors.  I don't use a backstop or a cover on the table. It's getting colorful. The inexpensive spray booths they sell on eBay and else where are very small and ineffective.  Worst of all they use proprietary filters. Larger commercial spray booths are available but, they cost prohibitive for a small shop and al

Which Finish Should I Use On My Toys?

Image
It's not a simple choice when you intend to sell them or even give them away. You have to consider the age of the person the toy is designed for. There are several finishes to choose from when finishing wooden toys. Drying Oils Non-Drying Oils Polyurethane Shellac Paint There may be others, but these are the ones I have used. If I am making a toy intended for a child under three years old that puts everything in their mouth and likes to chew on things No finish at all is probably the best choice. These toys should be very simple and made from woods like hard maple. Although ti its used by many toymakers, I would not put any sort of oil on these toys. In my totally unscientific testing, I find that kids will almost always go for the painted toys. I have seen a few exceptions to this, but not many. Where the kids get to look at the toys, the painted toys may rule the day. If selling online adults are usually the shoppers. They seem to like to see the wood grain, but not

What Airbrush Should I Buy For Painting Toys?

Image
I've made a lot of toys over the years. Most of the toys I made were not finished or had a little polyurethane on them. I didn't paint any of them. Then one day I saw some painted toys. that looked really nice. I decided that I wanted to try this out for myself. It seemed to me that air brushes would be the way to go. I had an airbrush that I had picked up at a yard sale years ago and an air compressor. I also went to school to learn autobody painting and worked as a painter for a short time. How hard could it be? It didn't take long before I realised that airbrushing toys was a lot more complicated than I had expected. The paints were very different and worst of all I could not just google up some videos about how to airbrush toys. Most people that were finishing toys were using mineral oil concoctions or rattle can paint. I didn't find a single tutorial how to about painting toys with an air brush. I was going to have to figure this all out for myself. I started

Testing Behr Oops Paint on a Play Pal Wooden Toy Trailer Truck

Image
2017-05-08 18.38.06 - Wooden Toy - Play Pal - Trailer - Truck - Blue - Behr - Paint - Acrylic This box trailer version was painted with blue Behr Oops paint from Home Depot with just a little Flowtrol added.  The Flowtrol slows drying and helps the paint to flow out smoother. Flowtrol doesn't help much when I painting on raw wood with a brush but it helps when spraying on smooth surfaces with an airbrush. House paint doesn't raise the grain near as much as the craft paint does.  I also seems to be more durable than the craft paint. It doesn't rub off like some craft paints. It is cheap and available in a wide array of colors.  Of course oops paint is only available in the colors they have messed up. I check the paint department at Home Depot every time I'm in the store looking for bright colors.  This can of paint cost fifty cents. Etsy Store: http://OdinsToyFactory.com #WoodenToys #WoodToys #WoodenToyTruck #WoodToyTruck #OdinsToyFactory #Handmade

Glidden Oops Paint Test On A Wooden Toy Play Pal Trailer Truck

Image
2017-05-08 18.44.30 - Wooden Toy - Play Pal - Trailer - Truck - Pink - Glidden - Paint I sometimes see sample jars of Glidden Oops paint at my local Home Depot.  I only have 3 cans of it on hand. This was a lighter pink than the Behr I have been using and I wasn't expecting it to cover as well as it did. The trailer in the photo has one coat of paint on bare wood.  It needs  second coat but that will do it. Sometimes when you buy oops paint the color on the out side of the can doesn't quite match the actual paint color. I think they just don't bother to mix it well before they paint the outside of the can. This was one of those. It was much lighter after it was thoroughly mixed. I added Flowtrol to this can of paint to help it flow out better. I add about 1 tablespoon or so unmeasured. I just pour what looks like a good amount and  mix it up. I always mark the can so I'll know if I have added it. This trailer is designed so a standard Play Pall toy car, truck,

Holding Small Parts While Finishing or Painting

Image
I needed to paint 200+ small dowels and needed some way to hold them. I ask the question in the toy makers forum and got a lot of good suggestions. The problem with these suggestions were that they only work well if your making one toy and only need to hold a few parts. I needed a much better solution that would work for lots of parts. I finally concluded that I needed something that worked perfectly for the parts I was making. It had to be cheap and easy to make. The part is exhaust pipes for my Hot Rod Freaky Fords . These are 1 inch long dowels that are glued into 1/4 inch deep holes. They need to be painted and leave enough pare wood for gluing. The first thing I came up with was this. Plywood Jig For Holding Small Parts Plywood Jig For Holding  Wooden Toy Car Parts While Painting - Exhaust Pipes for Hot Rod Freaky Fords Drying I just grabbed a piece of plywood that I had already and went to work. After I started painting I soon discovered that not only wa