Posts

Showing posts with the label Painting

Painting Handmade Wood Toys: Tips and Considerations for Using Acrylic Paint

Image
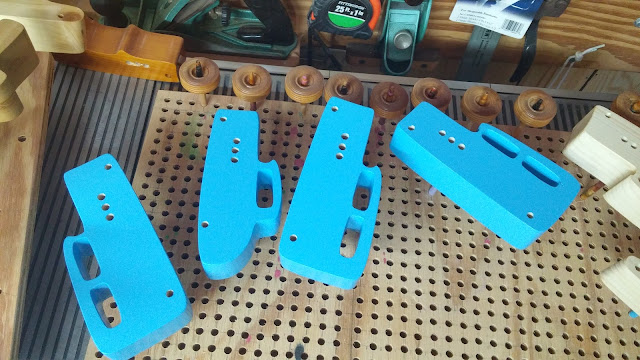
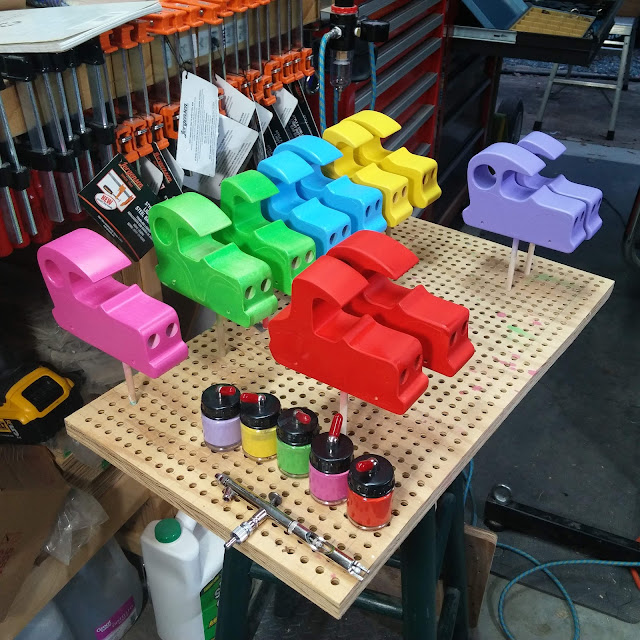
Handmade Wood Toy Cars Hot Rod Freaky Fords Being Painted With Acrylic Baby Blue Paint Hot Rods https://www.etsy.com/shop/odinstoyfactory?search_query=Hot+Rod Toy Cars https://www.etsy.com/shop/odinstoyfactory?section_id=34638962 Toy Trucks https://www.etsy.com/shop/odinstoyfactory?section_id=34653279 Painting handmade wood toys can be a fun and creative way to add color and personality to your creations. While many types of paints exist, acrylic paints are often favored due to their versatility and ease of use. This blog post will discuss some tips and considerations when using acrylic paint to paint handmade wood toys, explicitly focusing on drying time vs. cure time. First, let's briefly review the difference between drying and cure times. Drying time refers to the amount of time it takes for the solvent in the paint (in the case of acrylics, water) to evaporate, leaving behind a dry paint film. Curing and drying are usually measured in hours or days and vary depending on facto

How Temperature and Humidity Affect Finish Cure Times

Image
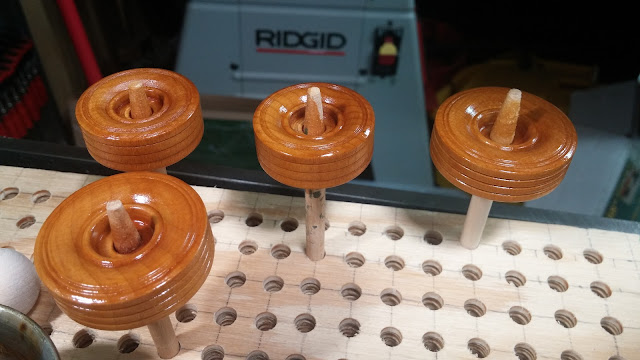
  Wheels For A Toy Car Curing After A Heavy Coat Of Amber Shellac   My Shop Front Page https://odinstoyfactory.etsy.com Temperature and humidity are two important factors that can significantly affect the curing process of finishes. The curing process is the time it takes for a finish to completely dry and harden, and it is essential for achieving a durable and long-lasting finish. This blog post will discuss how temperature and humidity can affect finish cure times. Temperature Temperature plays a critical role in the curing process of finishes. Warmer temperatures will accelerate the curing process, while colder temperatures will slow it down. This is because the chemical reactions during the curing process are temperature-dependent. When the temperature is too low, the curing process will take longer and may not even occur. Low temperatures can cause the solvents in the finish to evaporate too slowly, leading to a gummy or sticky finish. On the other hand, high temperatures can caus

Painting Toys With An Airbrush: What airbrush do you recommend?

Image
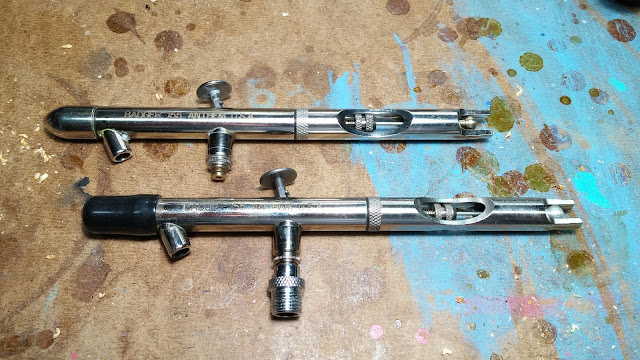
  Two of my Badger Anthen 155 Airbrushes     My Etsy Shop If you're thinking about painting toys with an airbrush, you may wonder what airbrush to use. One option that we highly recommend is the Badger 155 Anthem airbrush. This airbrush is versatile and can handle just about any paint or finish used for toy making. It's also a bottom-feed airbrush. There are Badger airbrushes that are top feed. The Badger 360 can be used for top or bottom feed. If you only need a small amount of paint, the top feed option is excellent because it allows you to use just a few drops at a time. The Badger airbrushes are made in the USA and come with excellent support from the manufacturer. If you have any questions or need help with your airbrush, the team at Badger is there to help. Overall, if you're looking for a reliable, high-quality airbrush for painting toys, the Badger 155 Anthem is a great choice. It's reliable, easy to use, and will give you great results every time. Badger 155  -

 Airbrushing for Toy Making: Which air compressor do I use?

Image
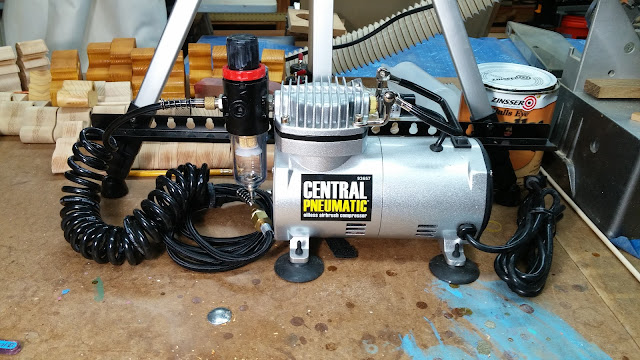
Visit My Etsy Store One important thing to note is that any compressor will work for airbrushing as long as you can regulate the pressure and filter the air. It is worth noting that none of the airbrush manufacturers make their compressors. If they do sell compressors, they are usually rebranded products from China. I have successfully used both a standard two-stage tank compressor and a Harbor Freight Central Pneumatic compressor. I even know someone who used a spare tire as an air source to paint a show car in their driveway (they used to sell an adapter that fits onto a valve stem to make this possible). The Harbor Freight compressor is a reliable and cost-effective option. It is quiet and portable, and it even comes with an airbrush. While I have no personal experience with the Harbor Freight airbrush, I have heard mixed reviews about its performance. It might work if you only plan on spraying paints explicitly designed for airbrushes. However, I often spray cheap acrylics, craft p

What size needle do you use in your airbrush for painting toys?

Image
Badger 155 Airbrushes Shop my Etsy Store Choosing the correct needle is essential to ensure you get the best results if you're planning on using an airbrush to paint your toys. The needle size will affect the flow of paint and the level of detail you can achieve. I recommend using a larger needle size, such as 0.5mm or 0.7mm, for general spraying. These sizes will allow for a smooth flow of paint and will make it easier to cover larger areas. Some airbrush needles are labeled as Fine(F), Medium(M), or Heavy(H). For general spraying, I recommend using a Heavy(H) needle. While you can use smaller needle sizes for more detailed work, you may need expensive airbrush paints to prevent clogging. I have never needed to use any smaller needle sizes when painting toys, but you may want to experiment with them to see what works best for you. It's also worth noting that the type of airbrush you use will play a role in determining the best needle size. I prefer the Badger 155 Anthem airbru

The Evolution of My Toy Maker's Shop Pegboards

Image
Several versions of the peg board used in my shop are 3/4-inch plywood, 3/4-inch plywood with hardboard backing, lazy susan, and 3/4-MDF with hardboard backing.   As a toy maker, I rely on my pegboards for painting and finishing my toys. But over the years, I've learned that not all pegboards are created equal. In this post, I'd like to share my journey of experimenting with different materials and designs to find the perfect pegboard for my needs. My first attempt at a pegboard was made from thin, narrow wood. While it looked nice, I quickly realized that the holes were spaced too far apart, and the wood needed to be heavier to prevent tipping when loaded with toy parts. So, I switched to 3/4-inch BC plywood and drilled the holes almost all the way through. The plywood worked better, but I still found that the board would tip if I tried to hang anything too heavy. It needed to be broader, heavier, and have deeper holes. Next, I tried drilling through the plywood and gluing it

Using Sanding Sealer On Little Blue Trucks Fail

Image
Buy On Goimagine As an experiment, I decided to use sanding sealer as a base coat on these trucks. The sealer dries fast, and I could start sanding the first one as soon as a finished applying the sealer to the last truck. I sanded using a red 3M Scotchbrite pad. It worked great, and the trucks were smoothed in short order. Seven coats of paint later after a coat of sanding sealer. It usually only takes three coats of paint and sometimes only two. The large truck in the upper left has two coats of paint on it. I think this is because the paint soaks into the wood with no sealer, and then the wood is blue. The paint can't soak in with sanding sealer, so I'm painting over what is essentially a white background. I will not be using a sanding sealer again for Navy blue paint. Although, it will probably work well for clear coats like polyurethane. #odinstoyfactory #handmade #woodtoys #madeinusa #madeinamerica #goimagine #littlebluetruck

Some Thoughts Airbrushes and Why I use Badger 155 Anthems When I Spray My Toys

Image
Two of my Badger 155 Airbrushes Click on the photo to see some examples of my toys. I am not an expert on airbrushes or how to use them. I paint toys with them, and that is it. This post is just a jumble of some things I learned about airbrushes the hard way. I use airbrushes and spray acrylic paints, and shellac. Acrylics are no big deal for cleaning up. I use generic window cleaner to clean my equipment. It cost about $1 for half a gallon the last time I bought some. Shellac is more expensive to use, but the cleanup is simple, and if you don't get it all out, a bit of denatured alcohol will loosen it up. Shellac is very forgiving. Just don't spray it when the humidity is high. The alcohol will pull water out of the air. It would be best if you strained your paint and shellac. I use the Harbor Freight paint filters and those disposable droppers to strain the paint. If you don't strain the paint, you will get clogs. Depending on the paint you use, you may need some additiv

Painting Handmade Toy Pickup Trucks With Pumpkin Orange and Black Acrylic Paint

Image
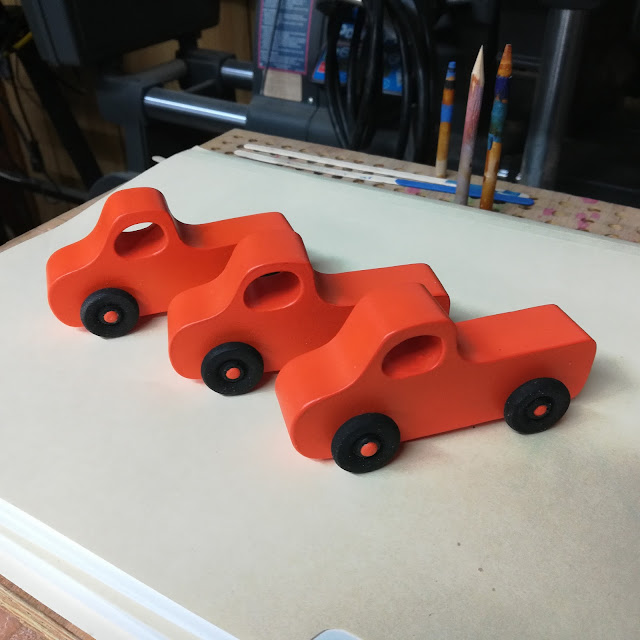
Handmade Wood Toy Toy Pickup Truck Pumpkin Orange and Black   When I saw the jar of Pumpkin Orange acrylic paint in the store, I could not resist. If you have ever painted anything with orange paint, you know, it has coverage issues due to its semi-transparent nature. It can take many paint coats before you get enough coverage that you can't see the underlying substrate through the orange paint. Even then, the color may not be as bright as you might like. Apple Barrel Pumpkin Orange Paint If you are painting something dark, the result may not be the bright orange you are expecting. To remedy this, you need a white base. Handmade Wood Toy Toy Pickup Truck First Coat Of Pumpkin Orange Paint On White Primer A sandable white primer is what you need for the first few coats, but you can get by with white paint. In this case, you want a pure white, not some off-white or eggshell color. What the white primer does is create a smooth reflective background for the orange paint. Apply as many

Toy Makers Shop - What Kind Of Primer Do You Use For Toys?

Image
I have tried many kinds of primer and nothing works as well as a shellac based primer.  Zinsser B-I-N It seals the wood so nothing bleeds through and you clean up with alcohol. No super toxic fumes. It sprays and brushes well. I reapply the primer and sand until it feels smooth.   For lighter colors, yellow for example, you need to use a white base coat or primer. Zinsser B-I-N primer bright white. Ot makes the xolors pop. All of the white parts on this car are Zinsser B-I-N primer with a clear coat on top. Note how the white background of my photo tent looks grey by comparison. 20141213-165701 Handmade Wooden Toy Car Bad Bob's Custom Motors Coupe Blue & White 653434064 The primer needs to be sandable. You may need to try some primers.  The first primer I tried didn't sand well at all. Shellac isn't the most sandable finish around. If it gets to hot it can melt and gum up your sandpaper. This means hand sanding with light pressure only.  There are many ot

What kind of paint are you using for your Bad Bob's Custom Motors cars?

Image
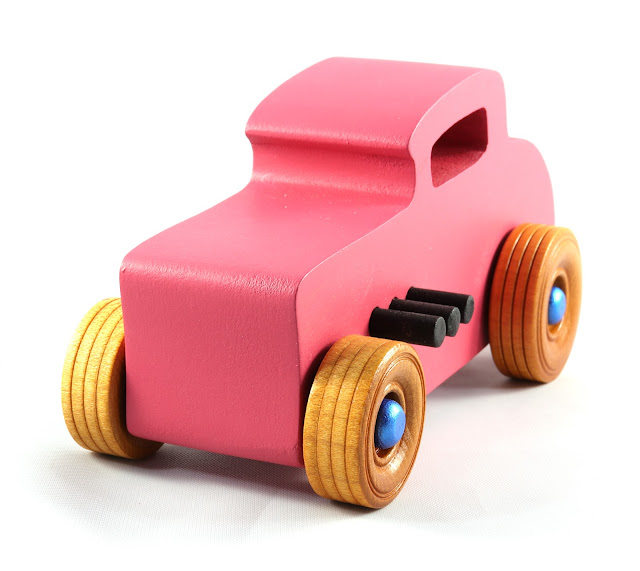
Bad Bob's Custom Motors I use a variety of paints from various sources. I like the acrylic house paints the best. All of the paints are nontoxic when cured.  I like to use a white primer to seal the wood and make the colors pop. In this case, I am using Zinsser B-I-N shellac based primer.  I prefer to use an airbrush for painting toys but, I have to paint outdoors, and the weather where I live does not cooperate, and I have to wait or use a brush. I used an airbrush for these wooden toy cars. My airbrush is a Badger Anthem 155.  I prefer acrylics over all other paints. They clean up easily, cover well, and are readily available in a vast array of colors. To clean, I flood with water to get rid of the bulk of the paint. The remaining paint is easily removed with ammonia-based cleaners such as window cleaner. I use household$ ammonia to remove dried paint.  I used the following to paint these wooden toy car bodies. Pink - Behr Acrylic House Paint Green - Apple Barrel Gl

What is the best primer sealer for MDF?

Image
Zinsser B-I-N White Shellac-Based Interior/Spot Exterior Primer and Sealer Is what I find works best. I originally purchased this to use for a white base to make the color pop. Previously I use white acrylic paint on top of shellac. It worked pretty good but using the shellac based primer I get a white base and sealer in one step. Shellac is compatible with just about any finish. It will seal pine knots. This primer is used for a sealer when repairing smoke damage after a fire. I just did a test on an MDF Play Pal minivan. One coat was all it took. I get it at  Home Depot in the paint department.  

Spray Booth For Painting Toys

Image
Spray booths need venting outside., Unless you like brain damage. I researched this subject a while back and experimented with some cardboard box with a fan and filters. Even with the box fan and filters, I got paint dust all over the shop. This method doesn't filter out fumes. I was using acrylic paint, so I was not concerned about fire. I would not use this configuration to spray solvent based finishes. If you re spraying outdoors that is a different matter altogether. I know someone who lets his the truck tailgate down and covers the back of his truck with a blue tarp to use for painting.  I have a table I make from saw horses to use when painting outdoors.  I don't use a backstop or a cover on the table. It's getting colorful. The inexpensive spray booths they sell on eBay and else where are very small and ineffective.  Worst of all they use proprietary filters. Larger commercial spray booths are available but, they cost prohibitive for a small shop and al

What Airbrush Should I Buy For Painting Toys?

Image
I've made a lot of toys over the years. Most of the toys I made were not finished or had a little polyurethane on them. I didn't paint any of them. Then one day I saw some painted toys. that looked really nice. I decided that I wanted to try this out for myself. It seemed to me that air brushes would be the way to go. I had an airbrush that I had picked up at a yard sale years ago and an air compressor. I also went to school to learn autobody painting and worked as a painter for a short time. How hard could it be? It didn't take long before I realised that airbrushing toys was a lot more complicated than I had expected. The paints were very different and worst of all I could not just google up some videos about how to airbrush toys. Most people that were finishing toys were using mineral oil concoctions or rattle can paint. I didn't find a single tutorial how to about painting toys with an air brush. I was going to have to figure this all out for myself. I started

Pink & Pink Play Pal Toy Trailer Truck Version 4 - The Car Hauler

Image
Pink Wooden Toy Play Pal Trailer Truck  Car Hauler Pink Wooden Toy Play Pal Trailer Truck  Car Hauler With Orange Bat Car There are two different brands and shades of paint used here. Not intentionally. Someone decided ti would be OK to thin the paint directly in the can and the dark pink was unusable when I got it out. I learned since then that you should never thin paint you want to keep with tap water. Chemicals in the water can react with the paint and cause it to do strange things. Like set up hard inside the can. Forget keeping paint thined with other chemicals. That will not happen again. Not to me anyway. The lighter pink on the trailer is Glidden and the cab is painted with Behr. Both are Oops paint from Home Depot. The Glidden paint on the trailer is flat so I coated it with clear shellac to brighten it up a bit and add a bit of durability. The wheels on the cab are my first "successful" attempt at flush cutting the axles. Successful in that

Testing Behr Oops Paint on a Play Pal Wooden Toy Trailer Truck

Image
2017-05-08 18.38.06 - Wooden Toy - Play Pal - Trailer - Truck - Blue - Behr - Paint - Acrylic This box trailer version was painted with blue Behr Oops paint from Home Depot with just a little Flowtrol added.  The Flowtrol slows drying and helps the paint to flow out smoother. Flowtrol doesn't help much when I painting on raw wood with a brush but it helps when spraying on smooth surfaces with an airbrush. House paint doesn't raise the grain near as much as the craft paint does.  I also seems to be more durable than the craft paint. It doesn't rub off like some craft paints. It is cheap and available in a wide array of colors.  Of course oops paint is only available in the colors they have messed up. I check the paint department at Home Depot every time I'm in the store looking for bright colors.  This can of paint cost fifty cents. Etsy Store: http://OdinsToyFactory.com #WoodenToys #WoodToys #WoodenToyTruck #WoodToyTruck #OdinsToyFactory #Handmade

Glidden Oops Paint Test On A Wooden Toy Play Pal Trailer Truck

Image
2017-05-08 18.44.30 - Wooden Toy - Play Pal - Trailer - Truck - Pink - Glidden - Paint I sometimes see sample jars of Glidden Oops paint at my local Home Depot.  I only have 3 cans of it on hand. This was a lighter pink than the Behr I have been using and I wasn't expecting it to cover as well as it did. The trailer in the photo has one coat of paint on bare wood.  It needs  second coat but that will do it. Sometimes when you buy oops paint the color on the out side of the can doesn't quite match the actual paint color. I think they just don't bother to mix it well before they paint the outside of the can. This was one of those. It was much lighter after it was thoroughly mixed. I added Flowtrol to this can of paint to help it flow out better. I add about 1 tablespoon or so unmeasured. I just pour what looks like a good amount and  mix it up. I always mark the can so I'll know if I have added it. This trailer is designed so a standard Play Pall toy car, truck,

Testing Anita's Acrylic Craft Paint

Image
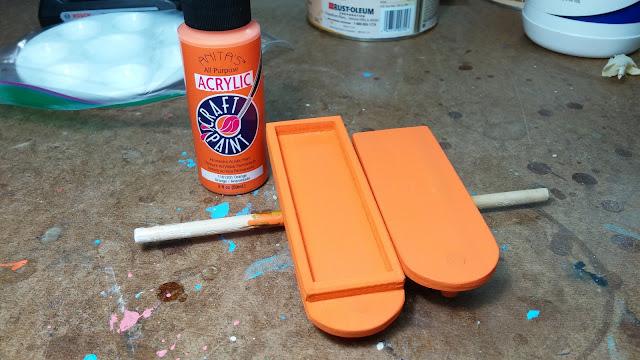
2017-05-08 18.20.48 - Wooden Toy - Play Pal - Trailer - Truck - Orange - Anita's - Acrylic - Craft - Paint I painted these two trailers with Anita's All Purpose Acrylic Craft Paint. I didn't use a primer or sealer coat of any kind. The paint was applied with a brush just as it came from the bottle. This is the first coat of paint. I was quite surprised at how well it covered the wood. The orange paints I have used in the past did not cover well at all.   Usually requiring multiple coats to get to the point where I could not see through it.  It raises the grain a lot but I expected this. Water based finishes of any kind will raise the grain. Etsy Store: http://OdinsToyFactory.com #WoodenToys #WoodToys #WoodenToyTruck #WoodToyTruck #OdinsToyFactory #Handmade

Holding Small Parts While Finishing or Painting

Image
I needed to paint 200+ small dowels and needed some way to hold them. I ask the question in the toy makers forum and got a lot of good suggestions. The problem with these suggestions were that they only work well if your making one toy and only need to hold a few parts. I needed a much better solution that would work for lots of parts. I finally concluded that I needed something that worked perfectly for the parts I was making. It had to be cheap and easy to make. The part is exhaust pipes for my Hot Rod Freaky Fords . These are 1 inch long dowels that are glued into 1/4 inch deep holes. They need to be painted and leave enough pare wood for gluing. The first thing I came up with was this. Plywood Jig For Holding Small Parts Plywood Jig For Holding  Wooden Toy Car Parts While Painting - Exhaust Pipes for Hot Rod Freaky Fords Drying I just grabbed a piece of plywood that I had already and went to work. After I started painting I soon discovered that not only wa