Posts

Showing posts with the label Jigs

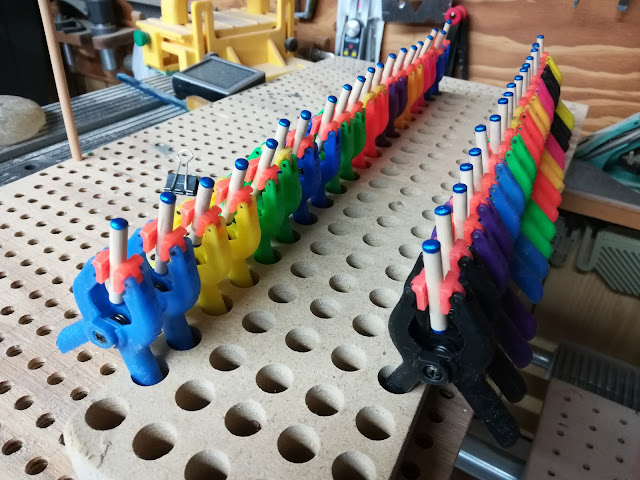
The Evolution of My Toy Maker's Shop Pegboards

Image
Several versions of the peg board used in my shop are 3/4-inch plywood, 3/4-inch plywood with hardboard backing, lazy susan, and 3/4-MDF with hardboard backing.   As a toy maker, I rely on my pegboards for painting and finishing my toys. But over the years, I've learned that not all pegboards are created equal. In this post, I'd like to share my journey of experimenting with different materials and designs to find the perfect pegboard for my needs. My first attempt at a pegboard was made from thin, narrow wood. While it looked nice, I quickly realized that the holes were spaced too far apart, and the wood needed to be heavier to prevent tipping when loaded with toy parts. So, I switched to 3/4-inch BC plywood and drilled the holes almost all the way through. The plywood worked better, but I still found that the board would tip if I tried to hang anything too heavy. It needed to be broader, heavier, and have deeper holes. Next, I tried drilling through the plywood and gluing it

Toymakers Shop - Handmade Wooden Toys Play Pal Axels On the Drying Rack 38 Clamps

Image
Toymakers Shop Handmade Wooden Toys Play Pal Axels On the Drying Rack 38 Clamps I dip my axels when I want to paint the ends. Because it is so thick, the paint has to dry overnight before it is safe to handle and there is paint on both ends. So far this is the best method I have come up with to hold the axles while the paint cures. This rack can handle up to 50 axles if I can find all of my clamps. There are 38 axles in the photo. The stand is a piece of MDF with 3/8-inch holes drilled all the way through and hardboard back. I like using MDF for these because it is flat and heavy. The weight helps to keep it from tipping when I have a heavy toy mounted. I have made these from solid wood and plywood but MDF works much better. This is an accidental jig. It was made to hold headlights made from dowels I used on a batch of cars I made. I was painting axles one day and discovered that these little Pitsburg Harbor Freight Spring Clamps fit perfectly.

How Do You Cut Dowels Into Small Pieces For Your Toys?

Image
Handmade Wooden Toy Dowel Cutting Jig With Japanese Pull Saw & Clamps For some reason never have understood many people want to use a complicated jig or some big power tool like a 12-inch sliding compound miter saw, table saw or bandsaw to cut dowels. The will go to a lot of trouble to build jigs to accomplish this without throwing pieces all over the garage or cutting their fingers off. You don't need to go to all this trouble. Pictured above is the jig I use. I didn't make this jig for cutting dowels. Originally this jig was an experimental wrench rack for mechanics combination wrenches made from big box store plywood. One day I need to cut some axels for a toy car I was building and was looking around for an easy way to hold the dowel and cut it straight when I spied this in the scrap pile. Its been on my workbench ever since then. To use it measure and clamp on a stop where the point you want to cut lines up with the edge of one of the slots. Clamp the dowel in

Holding Small Parts While Finishing or Painting

Image
I needed to paint 200+ small dowels and needed some way to hold them. I ask the question in the toy makers forum and got a lot of good suggestions. The problem with these suggestions were that they only work well if your making one toy and only need to hold a few parts. I needed a much better solution that would work for lots of parts. I finally concluded that I needed something that worked perfectly for the parts I was making. It had to be cheap and easy to make. The part is exhaust pipes for my Hot Rod Freaky Fords . These are 1 inch long dowels that are glued into 1/4 inch deep holes. They need to be painted and leave enough pare wood for gluing. The first thing I came up with was this. Plywood Jig For Holding Small Parts Plywood Jig For Holding  Wooden Toy Car Parts While Painting - Exhaust Pipes for Hot Rod Freaky Fords Drying I just grabbed a piece of plywood that I had already and went to work. After I started painting I soon discovered that not only wa