Posts

Etsy Listing - 482847326 - Handcrafted Wooden Toy Tow Truck From The Quick N Easy 5 Truck Fleet

Image
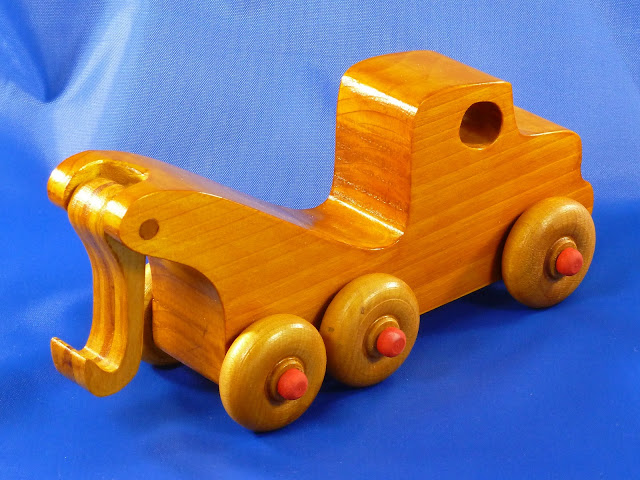
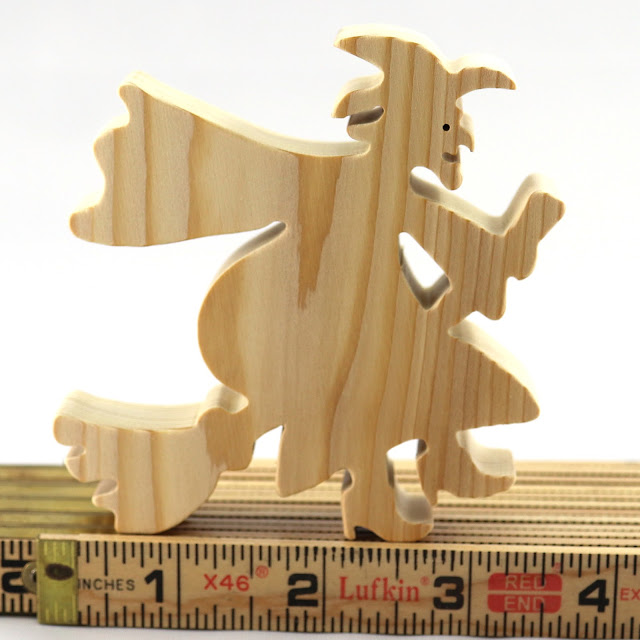
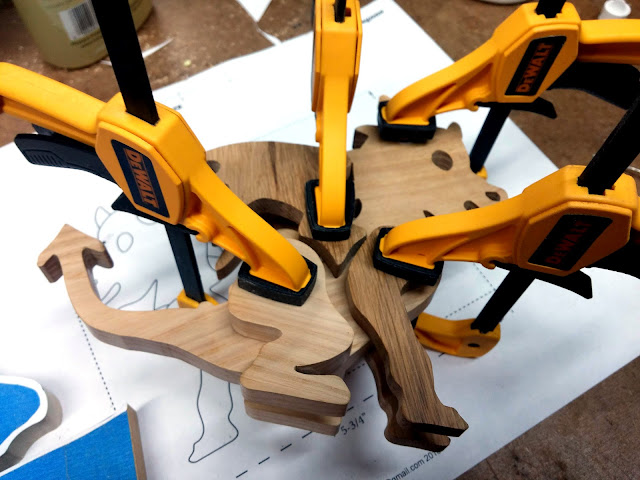
Handmade Wooden Toy Tow Truck From the Quick N' Easy 5 Truck Fleet This version of the toy tow truck is made from a solid pine wood block. While it appears relatively simple. However, some of the parts are a bit tricky to pull off. Making the opening for the hook must be done before cutting the body from the wood. Care must be used to get it all aligned properly, or the hook will be off centered or crooked. Getting the window shape correct is essential. I could just drill a round hole, but that would change the entire look of the toy. I like to avoid round holes when possible. This version uses axle pins. I like the look of them on toy trucks. However, it is critical that the axle holes be drill parallel to the bottom edge of the body so all the wheels will sit level on the surface.  If you are using a handheld drill, you should use dowels for axels. When using dowels, there is a bit of wiggle room so if the holes are off just a tiny bit the wheels will still sit

Toy Makers Shop - What Kind Of Primer Do You Use For Toys?

Image
I have tried many kinds of primer and nothing works as well as a shellac based primer.  Zinsser B-I-N It seals the wood so nothing bleeds through and you clean up with alcohol. No super toxic fumes. It sprays and brushes well. I reapply the primer and sand until it feels smooth.   For lighter colors, yellow for example, you need to use a white base coat or primer. Zinsser B-I-N primer bright white. Ot makes the xolors pop. All of the white parts on this car are Zinsser B-I-N primer with a clear coat on top. Note how the white background of my photo tent looks grey by comparison. 20141213-165701 Handmade Wooden Toy Car Bad Bob's Custom Motors Coupe Blue & White 653434064 The primer needs to be sandable. You may need to try some primers.  The first primer I tried didn't sand well at all. Shellac isn't the most sandable finish around. If it gets to hot it can melt and gum up your sandpaper. This means hand sanding with light pressure only.  There are many ot

Do you drill axle holes before or after painting?

Image
Drilling Hook Clearance  For A Handmade Wooden Tow Truck  I usually like to drill before I cut the pattern on my scroll saw, but there are plenty of exceptions. I can while the wood is square and easy to handle. The hole in the photo would be nearly impossible to drill after the truck body had been cut. If I cut before drilling, I find that holes near the edge can tear out easily. Such tear out is not easily repairable and the toy ruined. When using axle pegs, I drill first and ream the holes to exact size with a drill after I'm finished painting. This clears the holes of paint and removes any swelling in the wood cause from using water-based acrylic paint. Sometimes the paint will get chipped around the holes but since they are behind the wheels where you can't see. It's not a big deal. For regular axles that go all the way through it doesn't matter much since the hole are a good bit larger than the axle. For lighter toys, I use dowels for handles.  I inse

Witch On A Broom - Not Just For Halloween

Image
I'm writing this in March 2019. I just sold another witch on a broom. Either they are getting used for something else, or some folks celebrate Halloween all year round. I originally made these for toys for my Grandson who loves anything to do with Halloween. To him they are toys. He builds castles and haunted houses out of blocks for them. The witches are part of a set of pieces all having to do with Halloween. Skulls , skeletons , cats, jack-o-lanterns, bats, and spiders. Some local friends saw them and wanted their own set. I made enough for my Etsy store , and the witches have become some of my best sellers. Handmade Wooden Witch Cutout/Toy #odinstoyfactory #handmade #woodtoys #madeinusa #madeinamerica #halloween #cutout #witch #broom

Here There Be Dragons - Clamping & Glueing Handmade Toy Dragon

Image
I have just started making dragons. They are pretty simple to assemble, but gluing and clamping can be a challenge. You need to get the legs lined up correctly so the toy dragon will stand like they should. The parts always want to move around. Handmade Wooden Toy Baby Dragon in the Clamps Handmade Wooden Toy Baby Dragon Completed I use Titebond No-Run, No-Drip Wood Glue for this. This glue dries clear, sets up fast, and doesn't seem to move around asmuch. Titebond No-Run, No-Drip Wood Glue I prefer to use my Dewalt DWHT83191 4-1/2" Small Trigger Clamps for clamping. They deliver more than enough pressure and the one hand operation eases clamping. Dewalt DWHT83191 4-1/2" Small Trigger Clamp Spring clamps are fast but difficult to get aligned and the pressure isn't adjustable. Dewalt DWHT83191 4-1/2" Small Trigger Clamp I have some small F-Clamps but these almost require three hands. I'm not a big fan of these clamps they

Replacing My Harbor Freight Bench Top Drill Press With A Grizzly G7943 Drill Press (Update)

Image
I have done all the repairs and modifications and used the drill press for a while on several small projects. I'm going to call this a success. Replacement South Bend Chuck on MY Grizzly Drill Press The chuck worked just as I had expected. It works with bits smaller than the spec sheet indicates and is much better than the chuck that came with it. So much better than I'm considering buying a larger version for my large drill press. I got exactly what I wanted. A good drill press that would handle smaller bits. I use drill bits down to wire gauge sizes that neither my Shopsmith or larger drill press can handle. For production purposes, I didn't want to have to fool around with adapters or changing chucks. Some of the knobs were damaged, and I replaced them with these red ball knobs I found on Amazon. They came 10 to a bag, but they cost only $7.95. I had forgotten how much better I like ball knobs on a drill press. I plan to add these to some of my other tool

Converting Bitmap Patterns to Scalable Vector Graphics (SVG)

I'm not an expert with either of the software packages discussed here. Once I know what I want to do I ask the Google oracle for help and it always provides. If you have questions, you should ask Google. There are a lot of videos on YouTube, and some books are available. The learning curve is steep. If you are only going to make one toy and don't intend to make batches or modify the patterns, it may not be worth the effort to learn about these tools. This isn't a tutorial. It is a simple explanation of how I use Gimp and Inkscape in my toymaking. The first step I take when making something for the first time is to convert the patterns to SVG. I load the bit map patterns into Gimp and clean them up. The bitmaps get copied into Inkscape and converted into the SVG format. Why? First I get sharp, precise lines when you print the patterns. When you print from bitmaps the edges of the lines are jagged and fuzzy. If you want to enlarge the pattern, it gets worse. With the